How to Connect AirPods to a Dell Laptop: Step-by-Step Guide
Apple’s AirPods pair nicely with iPhones and iPads, among other Apple devices. However, they do not have to remain within the confines of the Apple ecosystem. Using their built-in Bluetooth capabilities, it is easy to connect your AirPods to almost any device out there, including your Dell laptop. The setup of the AirPods with a Dell laptop is easy, whether you use them for video calls, listening to music, or just want some peace. This tutorial will walk you through, step by step, the process of connecting the AirPods with a Dell laptop, troubleshooting issues that arise, and some common questions that are asked.
Table of Contents
How to Connect AirPods to a Dell Laptop
Step 1: Prepare Your AirPods
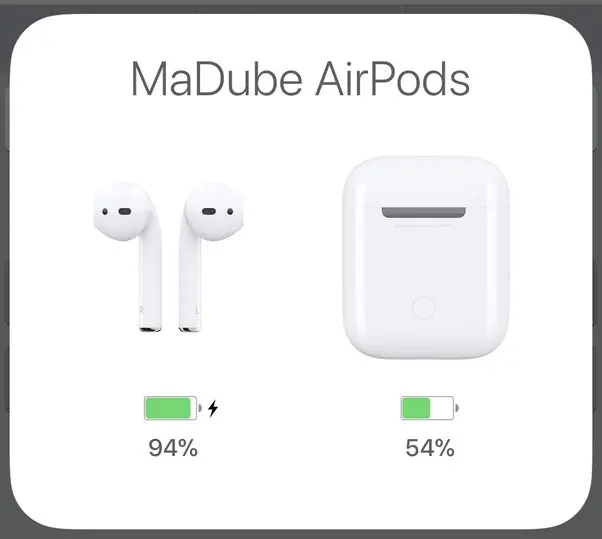
Now, get your AirPods ready before proceeding to the technical steps for pairing them:
- Charge Your AirPods: Put your AirPods to charge. Try to charge them at least 20% for it to be able to establish a proper connection.
- Put AirPods in the Case: Keep your AirPods inside the case.
Step 2: Turn On Bluetooth on Your Dell Laptop
To connect AirPods, your Dell laptop requires you to turn Bluetooth on. How to do that is explained below.
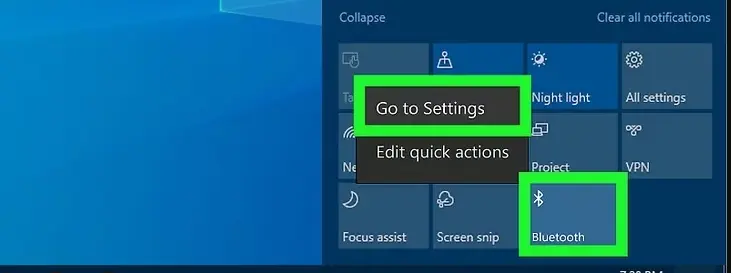
- Open Action Center: Tap the Action Center icon on your taskbar; it looks like a chat bubble, or hit Win + A on your keyboard.
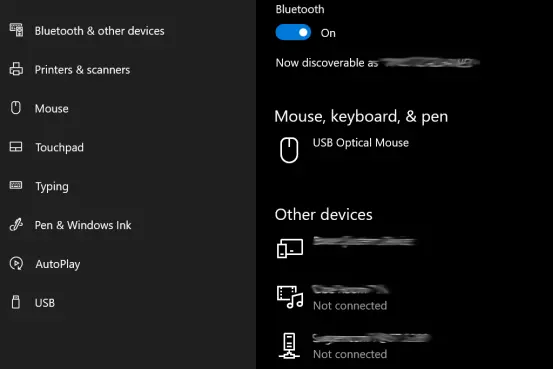
- Bluetooth Settings: Right-click the Bluetooth tile and then click “Go to Settings.”
- Enable Bluetooth: If it is off, then turn on Bluetooth. You should now see “Now discoverable as [Your Laptop Name]” right under Bluetooth.
Step 3: Put Your AirPods in Pairing Mode
Setting up your AirPods to be discovered by your Dell laptop is pretty easy; follow the steps below.
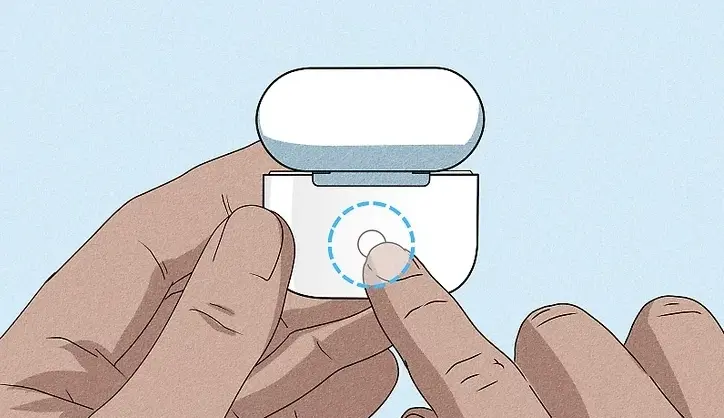
- Open the Case: Open the lid, but leave the AirPods inside.
- Press and Hold the Button: On the back of your AirPods case, there is a small button. Press and hold until the LED light flashes white; this is how your AirPods will enter pairing mode.
Step 4: Add AirPods as a Bluetooth Device
Now that both your AirPods and Dell laptop are ready, let’s connect them:
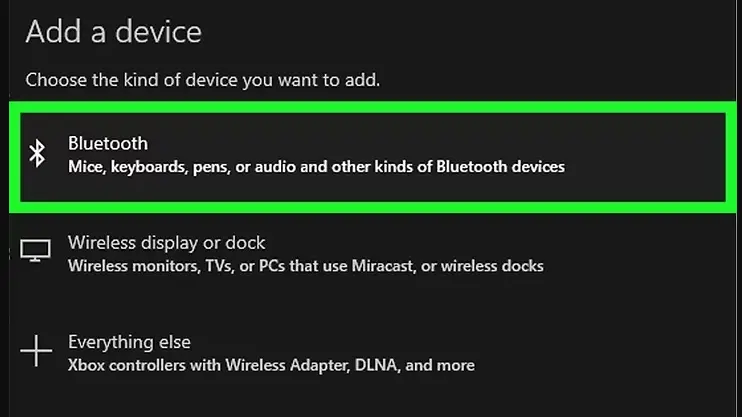
- Add Bluetooth Device: Open the Bluetooth settings on your laptop and click “Add Bluetooth or other device.”
- Select Bluetooth: Look for and click on the option to add a Bluetooth device.
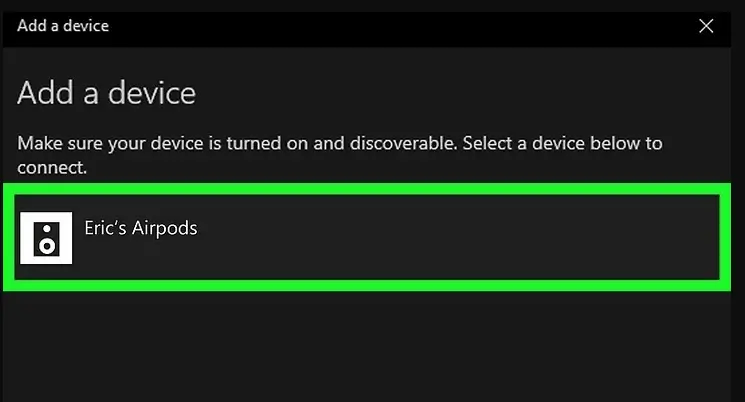
- Find Your AirPods: Your Dell laptop will now search for nearby Bluetooth devices. Once your AirPods show up on the list, click them to initiate pairing.
Step 5: Confirm Connection
Once the pairing process begins, you will be guided through a few prompts to complete the setup of your AirPods:
- Pairing Confirmation: After selecting your AirPods, look for the confirmation that they are connected.
- Finish Setup: When it says this is done, click “Done.” At this stage, your AirPods will now be ready to use with your Dell laptop.
Troubleshooting Tips for Connecting AirPods to a Dell Laptop
If your AirPods aren’t connecting with your Dell laptop, then this shouldn’t be an issue. Given below are some basic problems and their solutions.
AirPods Not Available under Bluetooth Devices
- Check the Bluetooth settings: Ensure that Bluetooth is turned on and that the laptop is discoverable.
- Restart Your Laptop and AirPods: Sometimes, a simple reboot can resolve issues in connectivity.
- Reset your AirPods: If that doesn’t still appear, reset your AirPods; hold the back button until the LED flashes amber and then white.
Sound Not Coming Through AirPods
- Choose AirPods for Output: On your taskbar, click the speaker icon and select your AirPods as an active output.
- Update Bluetooth Drivers: Connectivity may be due to really old drivers. Update your Bluetooth drivers to the latest.
Connection Dropping Frequently
- Check Battery Levels: Make sure your AirPods and laptop are appropriately charged.
- Minimize Interference: Move closer to your computer, away from devices that can cause potential interference with the Bluetooth signal.
Also Read: How to Unlock Dell Laptop Keyboard on Windows 10/11 Guide
Frequently Asked Question
Q: Can I use my AirPods on Zoom calls on my Dell laptop?
A: Of course, when it pairs up completely, your AirPods are ready to act as a mic and speakers during Zoom calls or any other video conferencing applications.
Q: Is there any special software that I can install to connect the AirPods with a Dell laptop?
A: No, You do not need to install other software. This will solely depend on the Bluetooth feature of your Dell laptop.
Q: Why is my Dell laptop not detecting my AirPods?
A: Just put your AirPods in pairing mode, flash the white light, and then, on your laptop, make sure Bluetooth is turned on. You can even restart both devices.
Q. Does Siri work with Dell laptops and AirPods?
A: As said before, Siri is by Apple and will not work on Dell.
Q. How can I unpair my AirPods from a Dell Laptop?
A: To disconnect, go to your Bluetooth settings, find your AirPods, and click “Disconnect.”
Conclusion
The process of connecting AirPods to a Dell laptop is quite easy and opens up a world of wireless conveniences. For work, studies, or enjoyment-actually, whatever purpose one intends to use them for, the above steps guarantee that it will be an easy connect-and-go affair. Remember, if problems do arise, the troubleshooting tips and FAQs provided will help keep those issues at bay in record time.
Now that you have learned how to connect AirPods to a Dell laptop, enjoy wireless audio freedom on your PC. AirPods can enhance your laptop experience with high-quality sound and convenience, whether you are in a meeting or just enjoying your favourite playlist.

