10 Steps: How to Secure Your Home Wi-Fi Network like a Pro
With experience in the writer’s den, I do something of quintessential importance: secure your Wi-Fi network. The connectivity hub that our homes have turned into in today’s times makes the Wi-Fi network entry point to a plethora of information and services. However, with the threat of cyber attacks on the rise, it calls for the use of necessary precautions to protect your network and your family’s privacy.
This all-inclusive guide will take you through ten critical steps on securing your home Wi-Fi network like a pro; this will enable you to develop a secure and reliable internet connection that can give you peace of mind and keep your data safe.
Table of Contents
The Importance of Securing Your Home Wi-Fi Network
The day is gone when a house used to be only a physical space, as they have turned into virtual sanctuaries wherein sensitive information, financial transactions, and work-from-home facilities exist. Thus, at least your home Wi-Fi network security is essential, forming this ecosystem’s backbone.
Unsecured Wi-Fi networks result in the vulnerability of devices and personal information against such cyber threats as hacking, theft of data, and malware attacks. Securing a home Wi-Fi network should safeguard family privacy, financial information, and unauthorized device access.
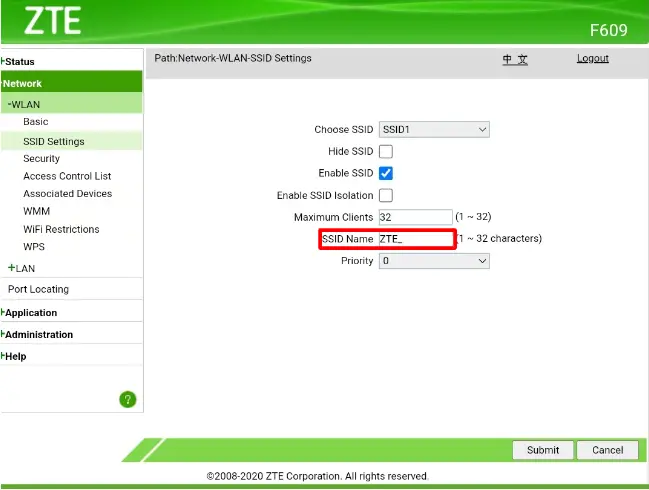
Step 1: Change the Default Username and Password
The first thing to do to secure your home Wi-Fi network is to change the default username and password used to access the router’s settings, set by the router manufacturer. Since these default credentials are well-known and well-documented, this attack vector will be easy for a hacker to use.
Create a rare, difficult-to-guess username and password that others cannot guess. No personal information should be used, like your name or birthdate. Use a mix of letters, numbers, and special characters. Store your new credentials safely and privately, and do not share them with anyone.
Step 2: Update Your Router’s Firmware
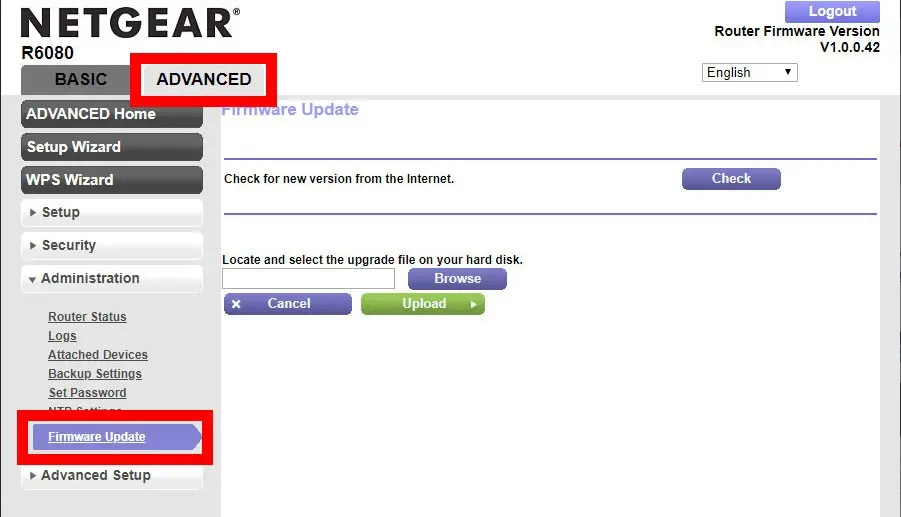
This will update your router with the latest firmware to secure your home Wi-Fi. This includes patching several known vulnerabilities in this tiny computer and further fortifying security measures on the device.
Look for an update on the manufacturer’s website or via your router’s administrative interface. Follow instructions for downloading updates carefully to ensure your router operates on the latest and most secure firmware version.
Step 3: Enable Encryption on Your Wi-Fi Network
Encryption plays a vital role in keeping your home Wi-Fi network secure. Enabling encryption will scramble your wireless traffic and make it unreadable to unauthorized users.
The most secure encryption protocol is WPA2, or, in its full name, Wi-Fi Protected Access II. This is the protocol that should be enabled in your router settings. You are supposed to generate a strong and unique encryption key password that would keep others out of your network.
Step 4: Use a Strong and Unique Wi-Fi Password
Most importantly, enable the encryption, and you should have a solid and unique password for your Wi-Fi. Your password should be a combination of letters, numbers, and special characters, both being predictable and reflecting your personal life.
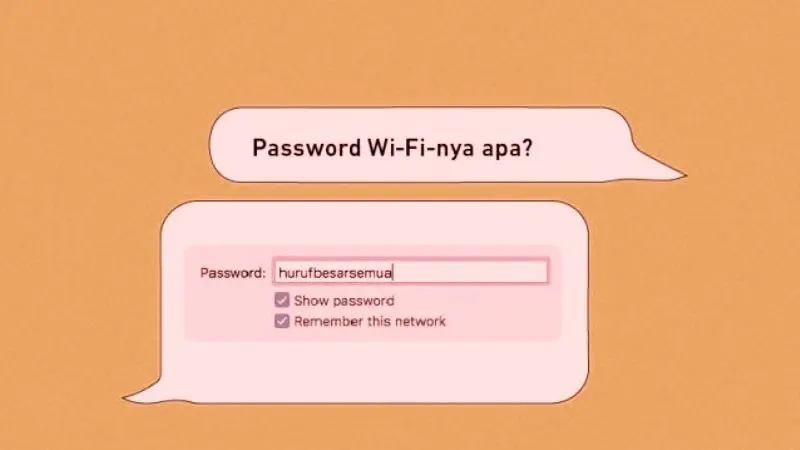
Avoid using usual words from the dictionary, common phrases, or sequences of numbers, as hackers can easily crack those through brute force. Better yet, it would help if you let a password manager create and store your Wi-Fi network’s complex, unique password for you.
Step 5: Disable Remote Management
Remote management is a feature that lets you access and configure your router outside the home network. While this is very handy, it carries a greater risk of accessing your network when not wanted.
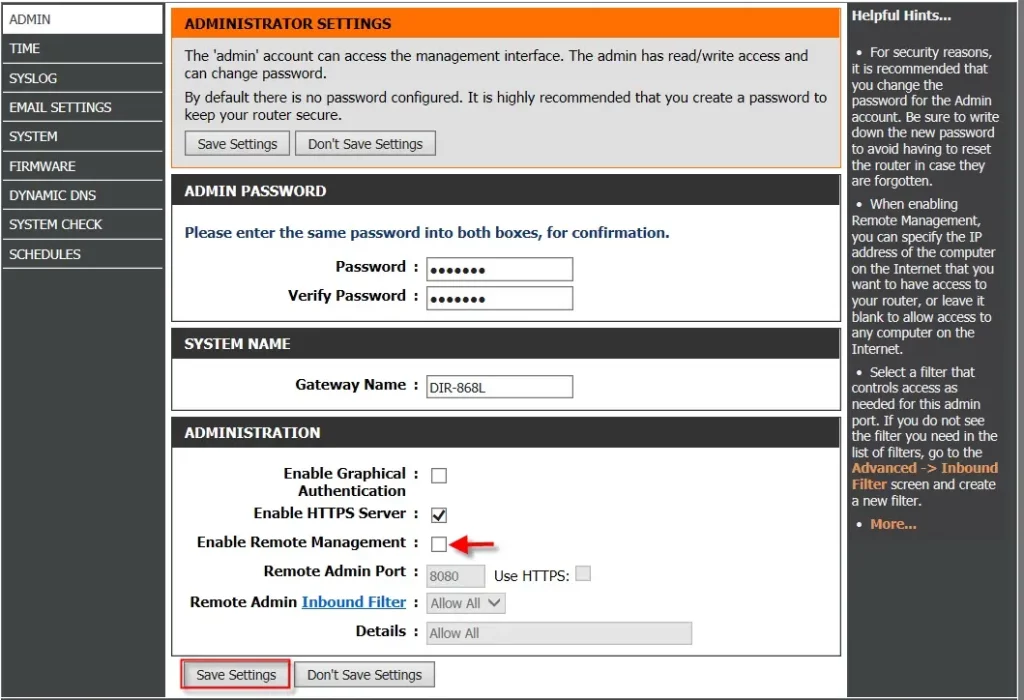
Ensure your network can only be accessed from inside your home by enabling the remote management feature in your router’s settings. This will deter hackers from trying to control your router remotely.
Step 6: Enable MAC Address Filtering
One security feature of the routers is the MAC (Media Access Control) address filtering, which allows you to decide which devices can connect to your Wi-Fi network. You can enable such a feature, which then involves creating a list of accepted MAC addresses; it will give access to your network to just those devices that you trust.
For MAC address filtering, you must search for the MAC addresses of the devices you want to allow and then add them to the approved list within your router settings.
Step 7: Disable SSID Broadcast
The SSID, or Service Set Identifier, is the name of your Wi-Fi network that shows up when nearby devices scan for networks. Turning off the broadcasting of the SSID can make the network less visible to would-be attackers and reduce the possibility of hacking in the process.
In your router’s settings, you can turn off the SSID broadcast; it might say something like turning the SSID off or hiding it. Note that this will require you to manually enter the name of the SSID on devices for connectivity.
Step 8: Enable Network Encryption Protocols
Of course, you can make your home Wi-Fi network even more secure, aside from WPA2 encryption, by allowing advanced encryption protocols such as WPA3 or HTTPS.
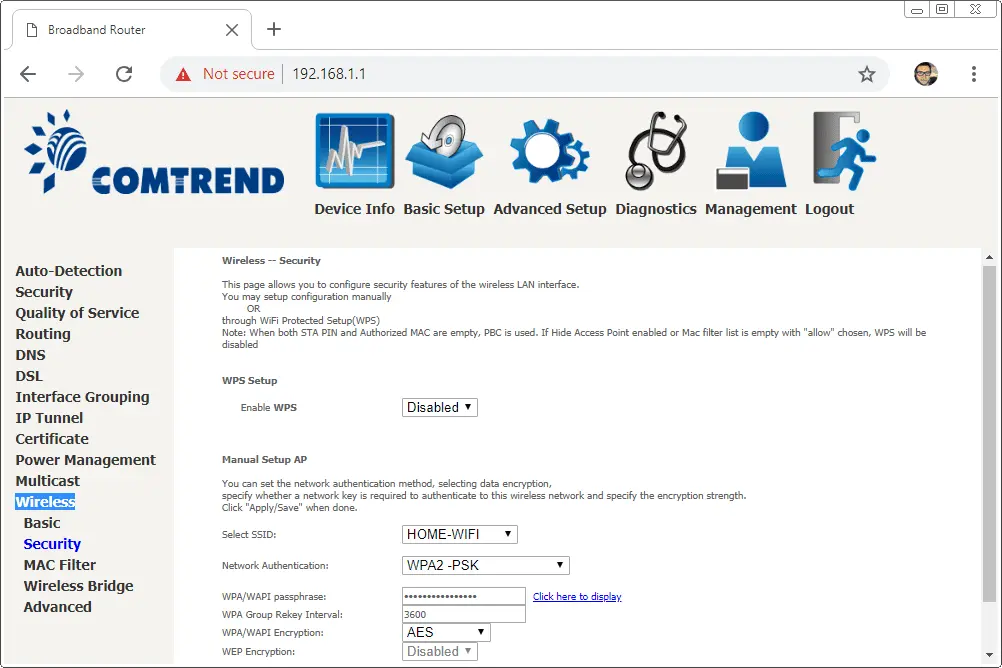
WPA3 is the most recent and secure kind of Wi-Fi encryption. It provides better protection against brute-force attacks and includes many advanced features that improve privacy. On the other hand, HTTPS allows for encryption of communications between your devices and the internet, adding an extra layer of security.
Step 9: Regularly Update and Patch Your Devices
Your home Wi-Fi network is only as secure as the devices that are connected to it. Keeping your laptop, smartphone, and even smart home gadgets up-to-date with the latest software and security patches will keep the network secure.

Enable auto-updates or regularly update your devices’ latest firmware and security updates to patch known vulnerabilities and help protect your network from the latest cyber threats.
Step 10: Use a VPN for Added Security
As this may improve the security around your home Wi-Fi network, further protection can be achieved by applying a VPN. It encrypts data over the internet, making it virtually impossible for hackers to intercept and monitor your online activities.
Therefore, consider investing in a good VPN service and configuration on your devices to ensure an increase in the security of personal data, primarily when connecting to public Wi-Fi or accessing sensitive information online.
Also Read: How to Add or Remove Google Chrome extension
Frequently Asked Questions
Q: How often do I change my WiFi password?
A: You should change your WiFi password every 6-12 months at a reasonable rate or whenever you feel your network has been compromised.
Q: Is it okay to use the default SSID for my router?
A: having the default SSID isn’t insecure, but it would be better to change it and give your WiFi network a more unique, descriptive name so that it is unrecognizable to the potential perpetrator.
Q: Should I turn both WPA2 and WPA3 encryption on?
A: If your router is WPA3 encryption-enabled, then enable it. You can also turn on both WPA2 and WPA3 if you have older devices incompatible with WPA3-and for all your devices to connect securely to your network.
Conclusion
It is essential to keep your home Wi-Fi secure for your family’s privacy and the safety of your digital assets. By following these steps, you can produce a very safe and reliable internet connection that will let you rest assured, protect your data, and allow you to sleep well at night.
Keep in mind that proper network security requires watchfulness and pro-activity. Occasionally, re-check and alter security measures and alert yourself to your network’s changes or suspicious activities. You can also be connected securely with him by taking the proper precautions:

