A Step-by-Step Guide on How to Airdrop like a Pro
Allow me to show, amply, as an experienced human writer, how one can master Airdrop. Airdrop is an incredible feature built right into the heart of Apple devices. It enables users to share files, photos, and more with anyone in the vicinity using an Apple device. This well-structured guide will allow you to understand and feel confident while walking through the process like a pro, from tech-savvy consumers to beginners in the Airdrop universe.
Table of Contents
Airdrop Compatibility and Requirements
First, we need to make sure that your device is Airdrop-enabled. This technology supports the following Apple devices:
- iPhone 5 or later
- iPad 4th generation or later
- iPad mini two or later
- iPod touch 5th generation or later
- Mac with macOS X Lion (10.7) or later
AirDrop requires both Wi-Fi and Bluetooth to be turned on, which means it works within 30 feet of the target device. Devices must also be signed in with the same Apple ID account.
Step 1: Enable Airdrop on Your Device
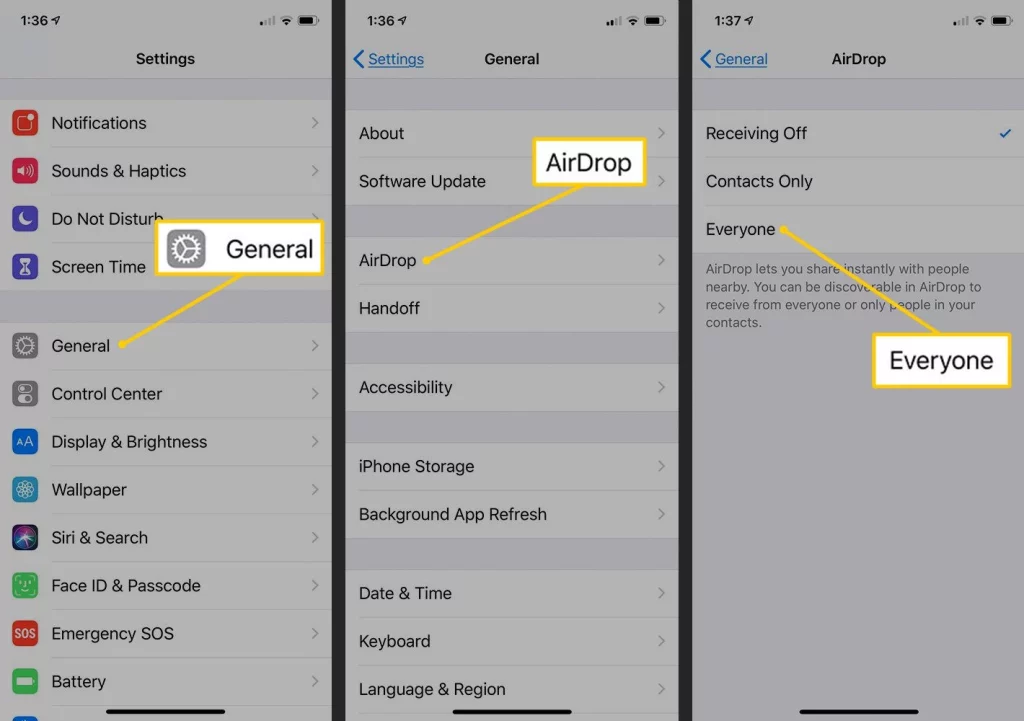
- iPhone, iPad, or iPod touch:
- Go to Settings >> General >> AirDrop.
- Tap “Contacts Only” or “Everyone,” whichever you prefer.
- Mac:
- Click the Finder icon in your Dock.
- Select “AirDrop” from the Finder menu.
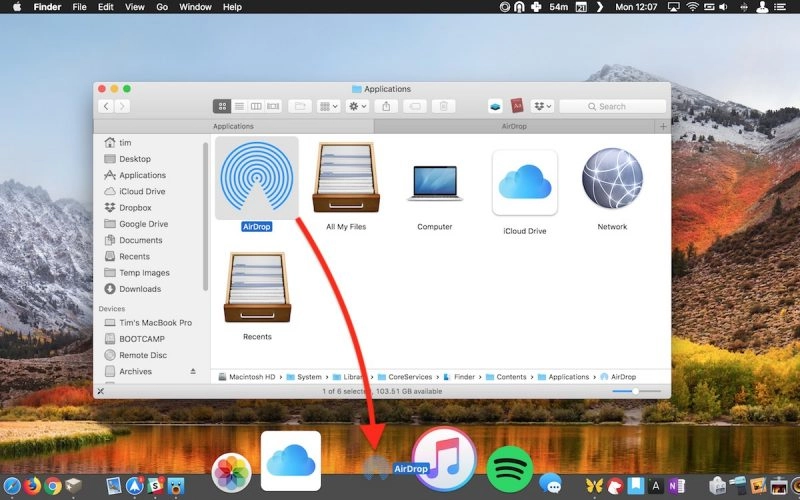
Click “Allow me to be discovered by,” then select “Contacts Only” or “Everyone.” Turning on Airdrop on your device makes it discoverable to other nearby devices with an Apple product for easy sharing of files.
Step 2: Choose the Files You Want to Airdrop
- On your iPhone, iPad, or iPod touch:
- Open a file or an app and select the document, image, webpage, etc., you want to share.
- Tap the Share icon- the little square box with an upward arrow.
- Tap on Airdrop from among the options.
- On your Mac:
- Locate the file or document you want to share on your desktop, in a folder, or where you last saved it.
- Right-click on the file and choose “Share” > “AirDrop.”
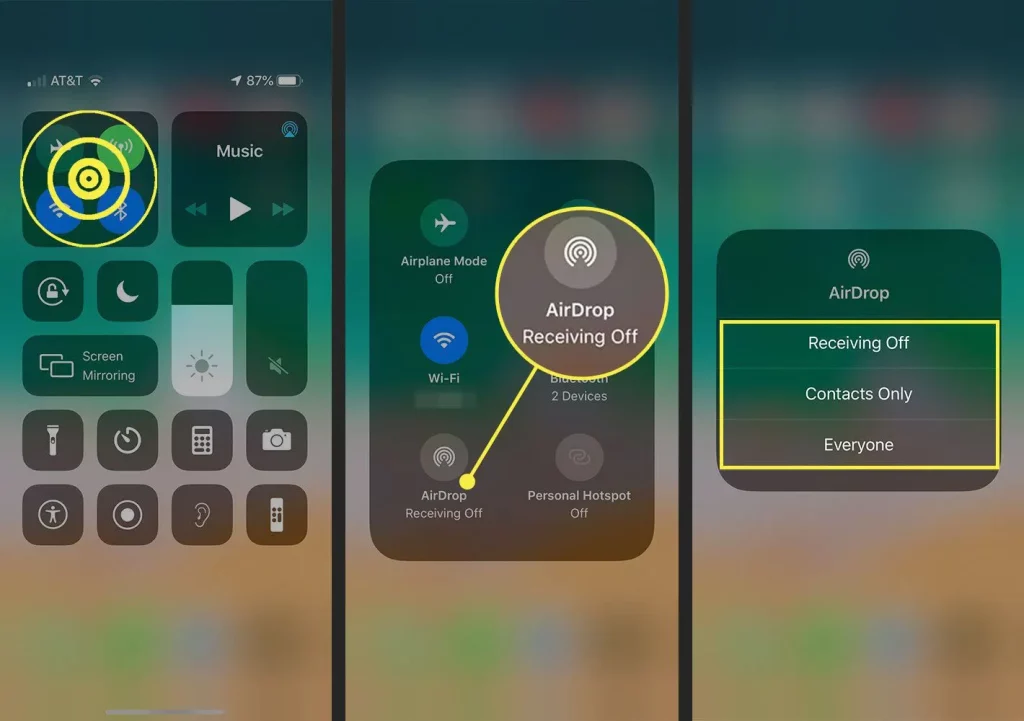

This will allow you to choose the files or contents you want to share with a recipient.
Step 3: Select the Recipient
- iPhone, iPad, or iPod touch:
- You should now see nearby Macs and iOS devices with Airdrop enabled in the menu.
- Tap a nearby user’s device with which you want to start the transfer.
- For your Mac:
- In the window, you should see nearby Macs and iOS devices with Airdrop enabled now.
- Drag the file onto the recipient’s device icon to initiate the transfer process.
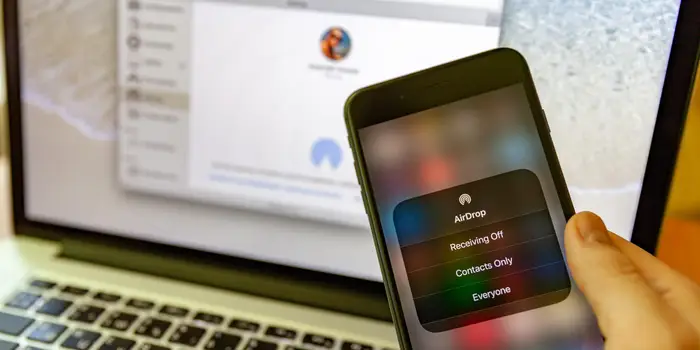

When you are about to select whom to send it to, ensure the device you are sending it is within the range of Airdrop and the receiver has enabled Airdrop settings.
Step 4: Sending and Receiving Files via Airdrop
- File Send:
- By opting amongst whom the person wants to send his file, the device will try to initiate the transfer.
- On his device, there will be a notification to receive or reject the file.
- Receiving Files:
- When you are being sent any file through Airdrop, on sending, you will receive a notification on your device.
- You “Accept” it by tapping to receive the file; tap “Decline” if you do not want to receive it.
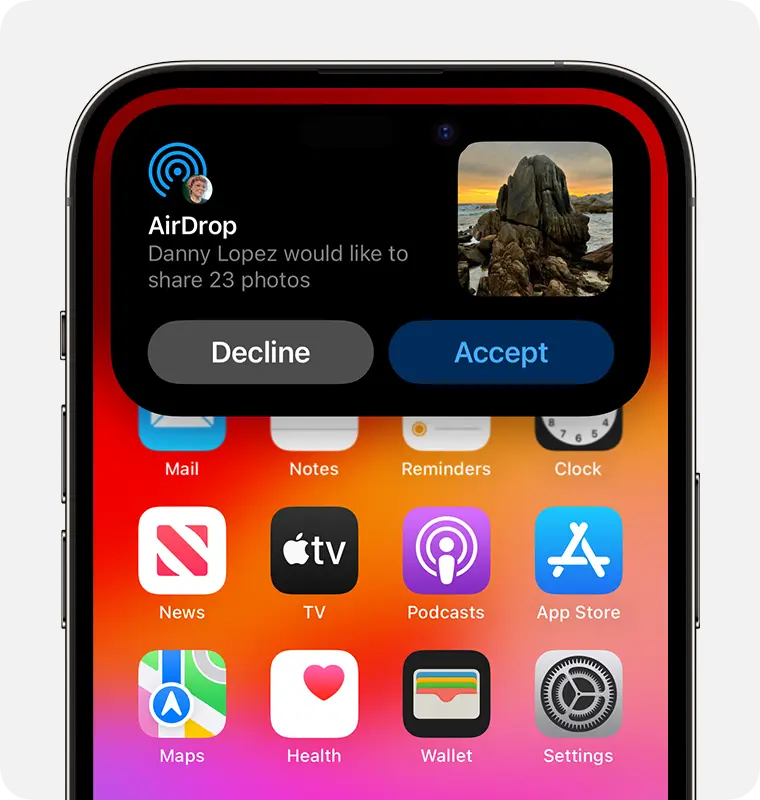
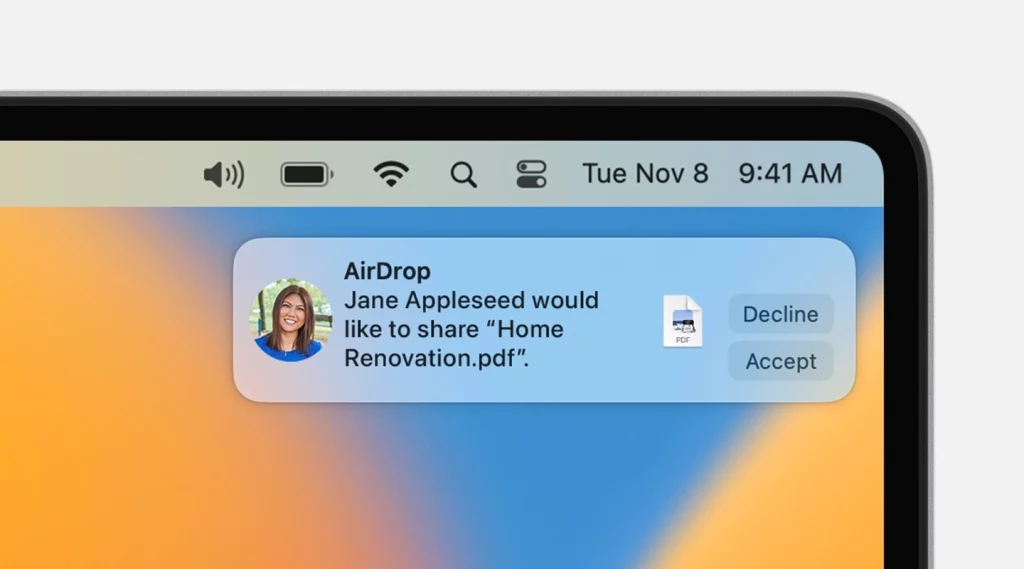
It will accept the request on the receiving end via Airdrop and vice versa, initiating the file transfer. Depending on the file size or network conditions, this may take a few seconds or even minutes.
Troubleshooting Common Airdrop Issues
While generally, AirDrop works quite seamlessly, some of the most common problems that may arise include:
- Devices Not Appearing: Devices should have Airdrop turned on and be within the 30-foot range. Check that Wi-Fi and Bluetooth are also turned on.
- Slow File Transfer: Try moving the devices closer together or check your network connection. Larger files take a bit longer to transfer.
Airdrop doesn’t work; you would restart both of your devices and try once more. If that fails to fix your problem, then a software update for the device or checking compatibility issues could be the next option.
Airdrop Alternatives
Use any of the following options in case Airdrop can’t work for you or you prefer to operate differently:
- Email: Attach the file and send it/them over to the email address of the other party.
- Cloud Storage: Use any cloud storage, such as iCloud, Google Drive, and Dropbox. You can upload it and then share it with the person before you.
- Chats: WhatsApp, Facebook Messenger, and Signal are just some apps that allow you to send files to your contacts.
Read Also: How to Find WiFi Password on Android, iPhone, and PC
More Information In Wiki: Airdrop
Frequently Asked Questions
Q: Can I AirDrop files to Android devices?
A: Airdrop belongs to Apple, so it works only among all the other Apple devices.
Q: Is Airdrop secure?
A: Airdrop will always encrypt your shared files with end-to-end encryption to protect their privacy and security.
Q: Can I Airdrop files to multiple recipients at once?
A: You can select more than one airdrop-enabled device as a recipient and share the file.
Conclusion
With such power, convenience, and ease comes facilitating your file-sharing needs. This step-by-step guide equips you with the knowledge and skills to airdrop like a pro. Remember to enable Airdrop settings on your device, select the correct files, pick the proper recipients, and troubleshoot if issues pop up. Take your Airdrop skills to the next level with this step-by-step guide to begin sharing your files like a pro today!

