Adjusting Microphone Sensitivity in Windows 10: Step-by-Step
As an experienced Windows 10 user, I understand the importance of having the right microphone sensitivity settings for optimal audio quality and performance. Whether you’re recording podcasts, conducting video calls, or simply enjoying your favourite music, the sensitivity of your microphone can make a significant difference in the overall audio experience.
In this comprehensive guide, I’ll walk you through the step-by-step process of changing microphone sensitivity in Windows 10 and provide valuable insights and troubleshooting tips to help you achieve the perfect audio setup for your needs.
Table of Contents
Introduction to Microphone Sensitivity in Windows 10
Microphone sensitivity refers to the audio input level your microphone can detect and amplify. A higher sensitivity setting means your microphone will respond more to even the softest sounds. In contrast, a lower sensitivity setting will require a louder input to produce the same audio level.
Adjusting the microphone sensitivity in Windows 10 can significantly impact the quality of your audio recordings, video calls, and voice-activated commands. By finding the right balance, you can ensure that your microphone captures your voice clearly and accurately without picking up unwanted background noise or distortion.
Understanding Microphone Sensitivity and Its Importance
Proper microphone sensitivity is crucial for a variety of reasons:
- Audio Quality: Adjusting the sensitivity can help you achieve the best possible sound quality, reducing issues like clipping, background noise, and muffled audio.
- Clarity and Intelligibility: Optimal microphone sensitivity ensures that your voice is captured clearly and intelligibly, making it easier for others to understand you during video calls or voice recordings.
- Compatibility with Voice-Activated Commands: Many Windows 10 features, such as Cortana, rely on accurate voice recognition. Adjusting the microphone sensitivity can improve the performance of these voice-activated commands.
- Improved Audio Editing and Post-Processing: If you’re involved in audio editing or content creation, proper microphone sensitivity can simplify the post-processing workflow and enhance the final output.
How to Check Microphone Sensitivity in Windows 10
Before adjusting your microphone sensitivity, it’s essential to understand your current settings first. Here’s how you can check your microphone sensitivity in Windows 10:
- Open the Start menu and search for “Sound“.
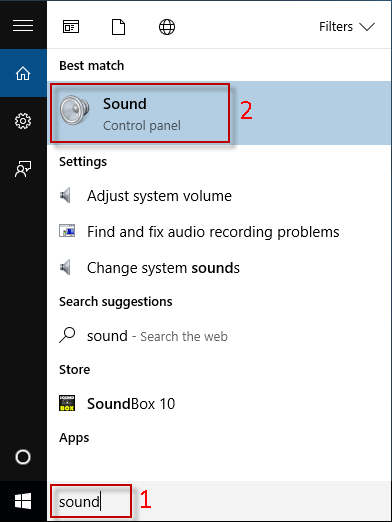
- Click on the “Sound” option to open the Sound settings.
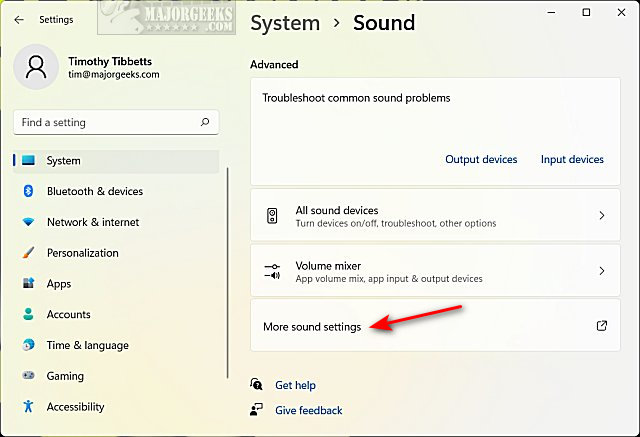
- In the Sound settings window, select the “Recording” tab.
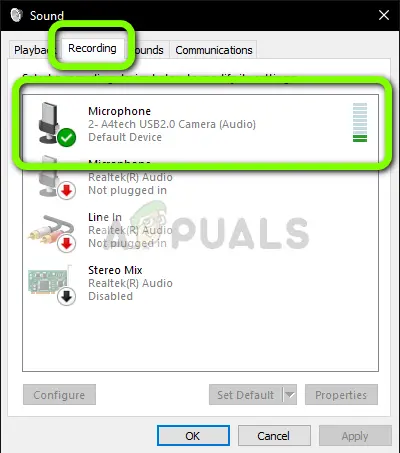
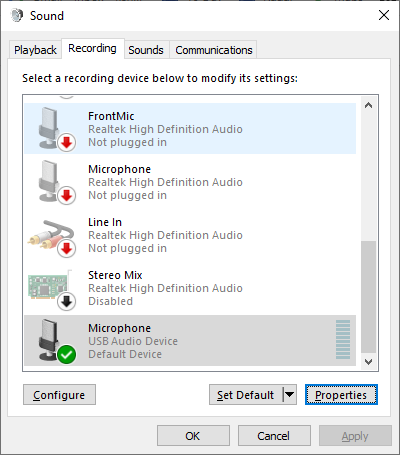
- Locate your microphone in the list of recording devices and right-click on it.
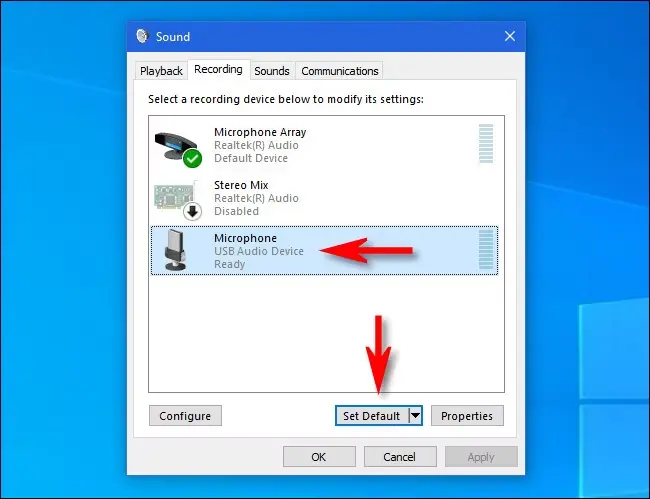
- Select “Properties” from the context menu.
- In the microphone properties window, navigate to the “Levels” tab.
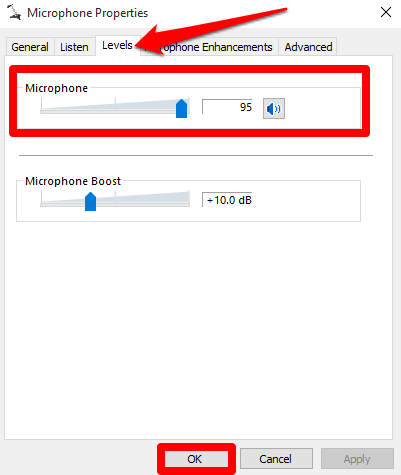
- The “Microphone” slider represents the current sensitivity setting. Note the position of the slider to understand your current microphone sensitivity level.
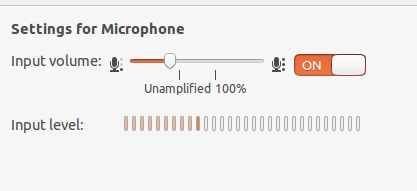
Adjusting Microphone Sensitivity in Windows 10 Settings
Now that you’ve checked your microphone sensitivity, it’s time to make the necessary adjustments. Here’s how you can change the microphone sensitivity in Windows 10 settings:
Open the Sound settings as described in the previous section.
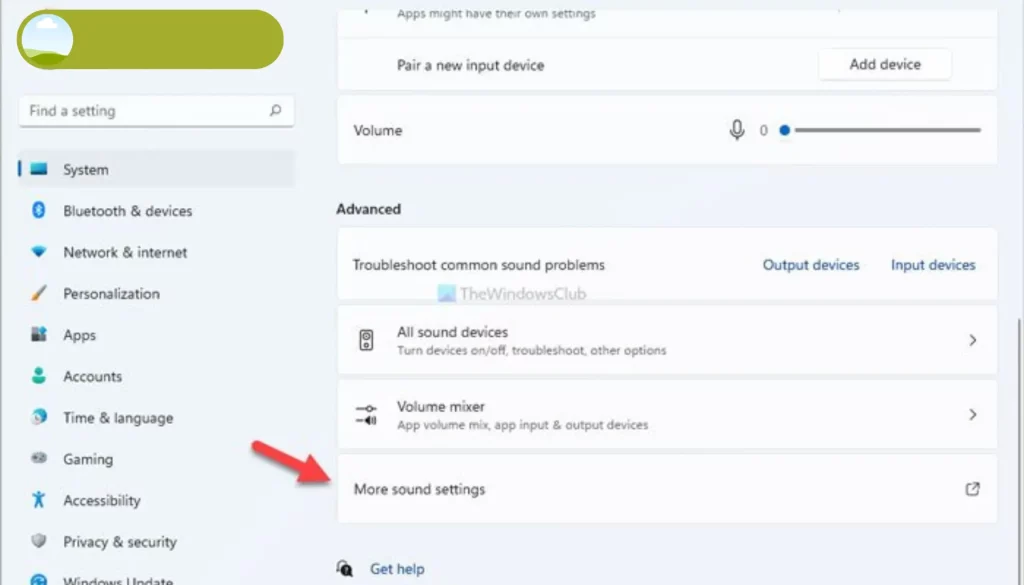
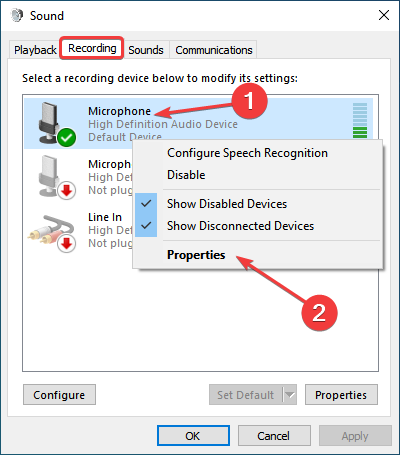
Locate your microphone in the “Recording” tab and right-click on it.
Select “Properties” from the context menu.
In the microphone properties window, navigate to the “Levels” tab.
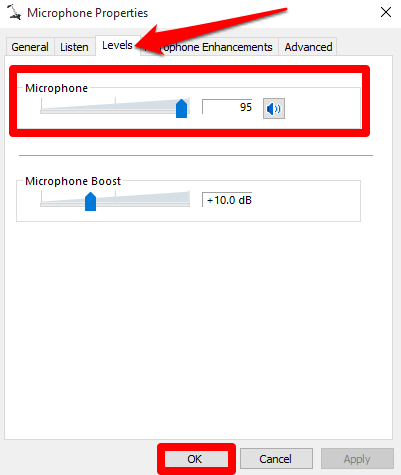
Adjust the “Microphone” slider to your desired sensitivity level. Move the slider to the right to increase sensitivity or to the left to decrease sensitivity.
Click “OK” to save the changes and close the window.
After adjustments, remember to test your microphone to ensure the new sensitivity level provides the desired audio quality and performance.
Using Third-Party Software to Change Microphone Sensitivity in Windows 10
While the built-in Windows 10 settings provide a straightforward way to adjust microphone sensitivity, several third-party software options offer additional features and customization options. Here are a few popular choices:
- Voicemeeter: This free audio mixing software allows you to fine-tune various audio settings, including microphone sensitivity, with a user-friendly interface.
- Virtual Audio Cable: This utility creates virtual audio devices that can route and manipulate audio signals, including microphone input.
- Audacity: Although primarily an audio editing tool, Audacity also provides advanced microphone settings and noise reduction capabilities.
These third-party solutions can be beneficial if you require more granular control over your microphone settings or are experiencing specific audio issues that the built-in Windows 10 settings can’t resolve.
Troubleshooting Common Issues with Microphone Sensitivity in Windows 10
While adjusting the microphone sensitivity in Windows 10 is generally straightforward, you may encounter some common issues. Here are a few troubleshooting tips to help you resolve any problems:
- Microphone Not Detected: If Windows 10 doesn’t detect your microphone, check the physical connections, ensure the device is installed correctly, and verify that the microphone is enabled in the Sound settings.
- Distorted or Muffled Audio: If you’re experiencing distortion or muffled audio, try lowering the microphone sensitivity to reduce the input level and prevent clipping.
- Background Noise: If your recordings or video calls are picking up unwanted background noise, try increasing the microphone sensitivity and using noise reduction or noise gate settings to filter out the unwanted sounds.
- Inconsistent Audio Levels: If you notice significant fluctuations in audio levels during use, try adjusting the microphone sensitivity to find a more stable and consistent input level.
Remember to experiment with the settings and test your microphone thoroughly to find the optimal configuration for your specific needs and environment.
Additional Microphone Settings to Enhance Audio Quality in Windows 10
In addition to adjusting the microphone sensitivity, there are a few other settings in Windows 10 that can help you enhance the overall audio quality and performance of your microphone:
- Microphone Boost: This setting allows you to amplify the input signal from your microphone, which can be helpful if your voice is too quiet or if you’re using a less sensitive microphone.
- Noise Suppression: Windows 10 offers built-in noise suppression features that can help reduce background noise and improve the clarity of audio recordings or video calls.
- Acoustic Echo Cancellation: This setting helps to eliminate echoes and feedback that can occur during audio playback and recording, improving the overall audio experience.
You can access and configure these additional microphone settings by navigating to the “Advanced” tab in the microphone properties window.
Frequently Asked Question
Q: What is the common problem with microphones?
A: Common microphone issues during recording include background noise, low volume, distortion, and connectivity problems. To troubleshoot: 1. Background Noise: Eliminate sources of noise, use a noise-cancelling mic,
Q: What causes microphone damage?
A: The aluminium diaphragm material in most ribbon mics is inherently fragile, and the diaphragm is mounted in a somewhat ‘floppy’ way, so sound sources that result in an apparent movement of air can cause physical damage to the diaphragm relatively easily (stretching, tearing,
Q: What is output volume?
A: The “Output Device Volume” is the volume of the output device on which you consume the audio (headset or speakers). If a user chooses to output some sounds, such as Discord, to the output device directly,
Q: How do you set the microphone level on the laptop?
A: In the Control Panel, click Hardware and Sound, then click Sound. In the Sound dialogue box, on the Recording tab, select your microphone, and then click Properties. In the Microphone Properties dialog box, adjust the microphone (and Microphone Boost, if available) levels on the Levels tab.
Conclusion
By following the steps outlined in this comprehensive guide, you’ll be well on your way to mastering microphone sensitivity in Windows 10 and enjoying better audio quality, clarity, and performance across various applications and use cases.
Finding the right microphone sensitivity settings is an iterative process, so don’t be afraid to experiment and fine-tune your audio setup until you achieve the perfect balance. If you have any further questions or need additional assistance, feel free to reach out to our team of audio experts for personalized support.
Related Article: Logitech Speakers Not Working on Windows 10 – Fix Like Pro!

