How to Install Kodi on Chromebook: Step-by-Step Guide
Being a great Kodi fan, I share the zeal to have this powerful media centre platform run on all sorts of devices, even on the versatile Chromebook. In this detailed guide, I’ll help you run Kodi on a Chromebook through a step-by-step process to unlock its potential and enhance your media consumption experience motion.
Kodi, formerly XBMC, is an open-source, free media player application that offers access and management to the broadest range of digital content, including movies, TV shows, music, and live TV. Its user-friendly interface, along with the incredibly detailed library of add-ons, has made Kodi the keystone for many media enthusiasts.
On the other hand, Chromebooks are famous these days. It is well-known that Chromebooks are lightweight, affordable, and reliable solutions against heavy traditional laptops. Even though Chromebooks have been designed with web-based tasks in mind and cloud-based applications, by installing Kodi on such devices, one can extend the versatility of such devices into a world of entertainment and media management possibilities.
Table of Contents
Benefits of Installing Kodi on Chromebook
By installing Kodi on your Chromebook, you can unlock a multitude of benefits that will enhance your overall media experience:
- Unified Media Management: Kodi allows you to centralize and organize your entire media library, including movies, TV shows, music, and more. It provides a seamless and intuitive way to access and enjoy your content.
- Expanded Content Availability: Kodi’s vast ecosystem of add-ons and plugins allows you to access a wide range of online streaming services, live TV channels, and even niche content that may not be available through traditional platforms.
- Cross-Platform Compatibility: Kodi is designed to be platform-agnostic, meaning you can enjoy the same media experience across various devices, including your Chromebook. This allows you to access your content from anywhere.
- Customization and Personalization: Kodi offers extensive customization options, enabling you to tailor the interface, skins, and add-ons to your preferences, creating a truly unique media experience.
- Cost-Effective Solution: Kodi is a free and open-source platform, making it a cost-effective alternative to traditional paid media services. It allows you to save money while still enjoying a rich and diverse media experience.
Compatibility and System Requirements
Before we start the installation process, you must ensure your Chromebook is compatible with Kodi and meets the system requirements. Kodi is developed to run on a vast array of devices in which Chromebooks are included, but there are some significant points to be taken into consideration:
- Chromebook Model: Kodi can be installed on most Chromebook models, but some older or less powerful Chromebooks may not provide the best performance. For an optimal experience, it’s recommended to use a Chromebook with at least 4GB of RAM and a relatively recent processor.
- Operating System: Kodi is compatible with various operating systems, including Windows, macOS, and various Linux distributions. For Chromebooks, the installation process will vary depending on the version of Chrome OS you are running.
- Storage Space: Kodi and its associated add-ons and media files can consume significant storage space. Ensure that your Chromebook has sufficient storage capacity, or consider using an external storage device or cloud-based storage solutions to supplement the available space.
By ensuring your Chromebook meets these basic requirements, you can confidently proceed with the installation process, knowing that your device is well-equipped to handle the demands of Kodi.
Preparing Your Chromebook for Kodi Installation
Before we begin the installation process, there are a few preparatory steps you should take to ensure a smooth and successful Kodi setup on your Chromebook:
- Enable Developer Mode: Kodi requires your Chromebook to be in Developer Mode, which allows you to install and run third-party applications. To enable Developer Mode, follow these steps:
- Press and hold the Ctrl + Alt + Shift + F3 keys simultaneously.
- Your Chromebook will reboot and enter Recovery Mode.
- Press Ctrl + D to enable Developer Mode.
- Follow the on-screen instructions to complete the process.
- Backup Your Data: As a precautionary measure, it’s recommended to back up any critical data on your Chromebook before proceeding with the Kodi installation. This will ensure that you can restore your files in case of any unexpected issues during the process.
- Connect to a Stable Internet Connection: The Kodi installation process will require downloading various files and updates, so it’s essential to have a stable and reliable internet connection to ensure a seamless experience.
- Ensure Sufficient Storage Space: As mentioned earlier, Kodi and its associated media files can consume significant storage space. Ensure you have enough storage on your Chromebook, or consider using an external device.
These preparatory steps set the stage for a successful Kodi installation on your Chromebook, minimizing the risk of complications or data loss.
Step-by-Step Instructions for Installing Kodi on a Chromebook
Now that your Chromebook is ready, let’s dive into the step-by-step process of installing Kodi:
1. Enable Linux on Your Chromebook: Kodi requires a Linux-based environment to run on Chromebooks. To enable Linux, follow these steps:
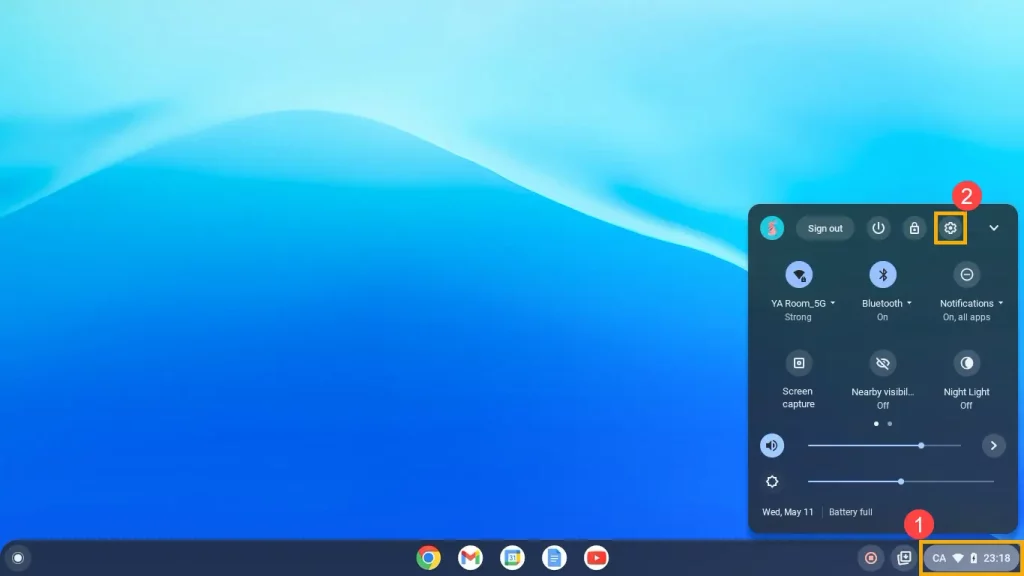
- Open the Settings app on your Chromebook.
- Navigate to the “Linux (Beta)” section and turn on the feature.
- Follow the on-screen instructions to complete the Linux setup.
2. Install the Required Dependencies: Kodi has several dependencies that need to be installed before you can proceed with the Kodi installation. Open the Terminal app (which is now available due to the Linux setup) and run the following commands:
Copu Code
sudo apt-get update sudo apt-get install software-properties-common sudo add-apt-repository ppa:team-xbmc/ppa sudo apt-get install kodi3. Launch Kodi: Once the installation is complete, you can launch Kodi from the Applications menu on your Chromebook. Alternatively, you can search for “Kodi” in the app launcher and click the icon to start the application.
4. Configure Kodi: Upon launching Kodi for the first time, you’ll be presented with the initial setup wizard. Follow the instructions to configure your Kodi settings, such as your media library, add-ons, and user preferences.
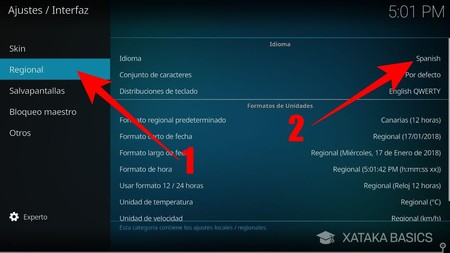
5. Update Kodi: Kodi is regularly updated with new features, bug fixes, and security improvements. Keeping Kodi up-to-date is recommended to ensure you enjoy the best possible experience. You can check for updates by going to the “Settings” menu and navigating to the “System” section.
Following these step-by-step instructions, you’ll have successfully installed Kodi on your Chromebook, paving the way for a seamless and enjoyable media experience.
Troubleshooting Common Issues During Installation
While the Kodi installation process on Chromebook is generally straightforward, you may encounter some common issues. Here are a few troubleshooting tips to help you overcome any challenges:
- Developer Mode Verification Error: If you encounter an error during the Developer Mode setup, try rebooting your Chromebook and attempting the process again. Ensure you follow the steps precisely, as any deviation can lead to issues.
- Linux Setup Failure: If the Linux setup on your Chromebook fails, try closing and reopening the Linux app or check for any updates to the Chrome OS that may have affected the Linux integration.
- Dependency Installation Errors: If you encounter any issues while installing the required dependencies, double-check the commands and ensure your internet connection is stable. You can also try running the commands with “sudo” to ensure proper permissions.
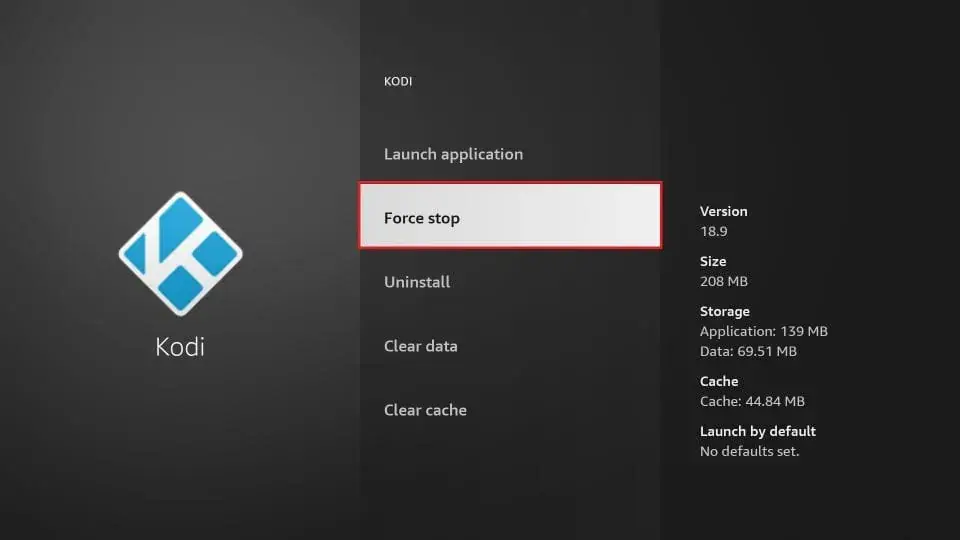
- Kodi Crashes or Freezes: If Kodi crashes or freezes during use, try clearing the cache and data or reinstalling the application. You can also check the Kodi logs for error messages that may help identify the root cause.
- Performance Issues: If you experience sluggish performance or lagging while using Kodi on your Chromebook, try closing any unnecessary background apps or processes, or consider upgrading to a more powerful Chromebook model.
Remember, if you encounter persistent issues or have specific questions, you can always refer to the Kodi community forums or contact the Kodi support team for assistance.
Configuring Kodi on Chromebook
Now that you have successfully installed Kodi on your Chromebook, it’s time to configure the application to suit your personal preferences and media consumption needs. Here are some steps to get you started:
- Media Library Setup: Kodi allows you to organize your media files into a centralized library. Add your local media files (movies, TV shows, music, etc.) to the appropriate sections within Kodi’s library.
- Add-on Installation: Kodi’s true power lies in its extensive ecosystem of add-ons, which provide access to a vast array of content, from live TV and sports to online streaming services. Explore the Kodi add-on repository and install the ones that align with your interests.
- Skin and Interface Customization: Kodi offers a wide range of skins and interface customization options, allowing you to personalize the application’s look and feel. Experiment with different skins and layouts to find the one best suits your preferences.
- Remote Control Setup: For a more convenient media experience, consider setting up a remote control app or device to control Kodi on your Chromebook from the comfort of your couch.
- Backup and Restore: Kodi allows you to back up your entire configuration, including your media library, add-ons, and settings. This can be particularly useful if you need to reinstall Kodi or switch to a new Chromebook.
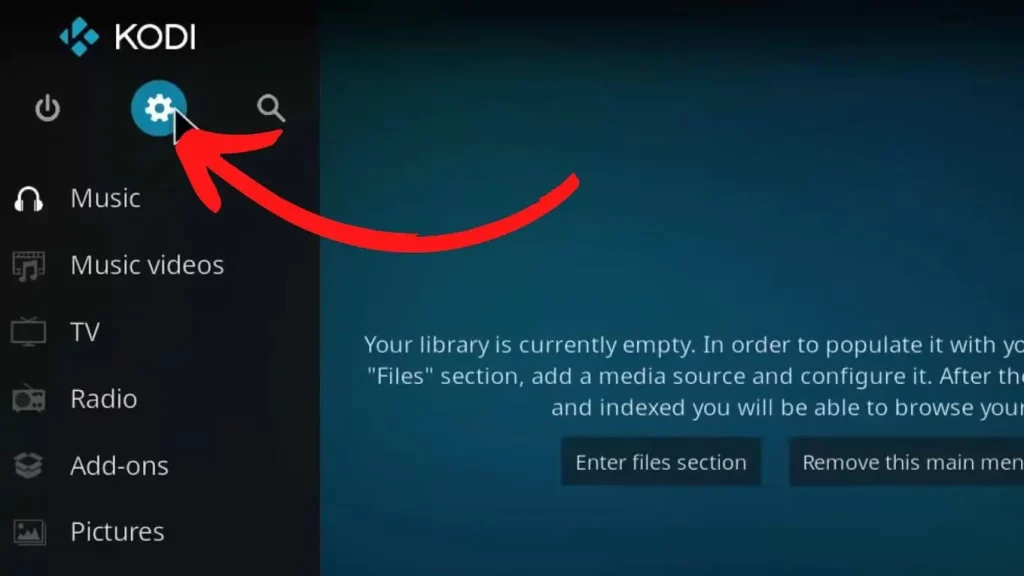
By configuring Kodi to your liking, you can create a media experience that caters to your specific needs and preferences.
Useful Kodi Add-ons and Features for Chromebook Users
To enhance your Kodi experience on your Chromebook, here are some recommended add-ons and features to explore:
- Live TV and DVR: Add-ons like Pluto TV, Tubi TV, and Plex Live TV can provide access to a wide range of live TV channels and DVR functionality to record your favorite shows.
- Streaming Services: Install add-ons for popular streaming platforms like Netflix, Hulu, Amazon Prime Video, and Disney+ to access a vast library of movies, TV shows, and original content.
- Sports Channels: Explore sports-focused add-ons like ESPN, Fox Sports, and Sling TV to stay up-to-date with your favorite teams and live sporting events.
- Music Streaming: Integrate Kodi with music streaming services like Spotify, SoundCloud, and Tidal to enjoy your favorite tunes seamlessly.
- Media Scraper: Add-ons like The Movie Database (TMDb) and The TV Database (TVDB) automatically retrieve metadata, artwork, and information for your media files, enhancing the overall library experience.
- Cloud Storage Integration: Connect Kodi to cloud storage services like Google Drive, Dropbox, or OneDrive to access your media files from anywhere, leveraging the cloud’s storage capabilities.
- Subtitle Support: Install add-ons like OpenSubtitles, SubZero, or Sub-Zero to automatically download and apply subtitles for your movies and TV shows.
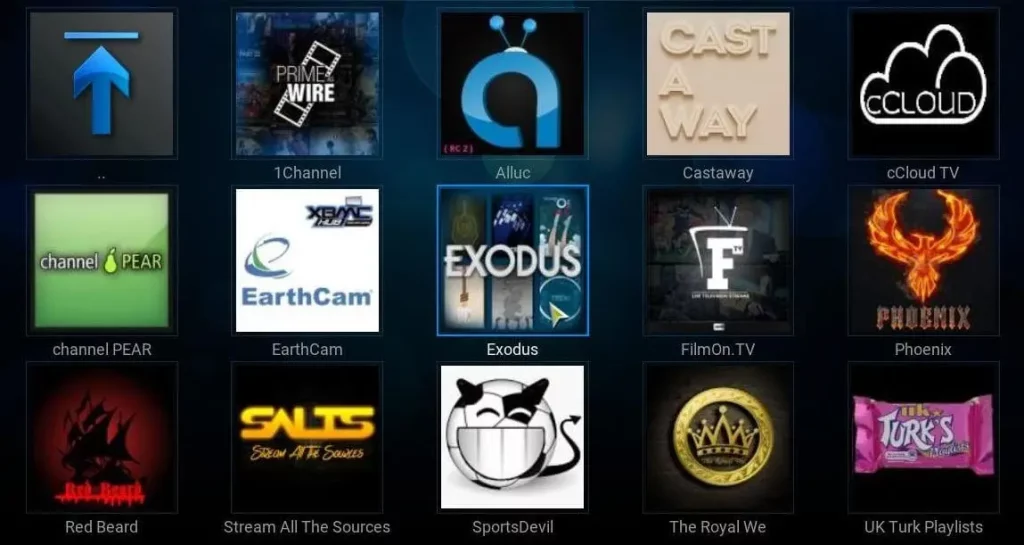
By exploring and utilizing these Kodi add-ons and features, you can transform your Chromebook into a powerful and versatile media center tailored to your needs and preferences.
Tips and Tricks for Optimizing Kodi Performance on Chromebook
To ensure the best possible Kodi experience on your Chromebook, consider the following tips and tricks:
- Hardware Optimization: If your Chromebook struggles with Kodi’s performance, consider upgrading the RAM or processor or exploring a more powerful Chromebook model.
- Disable Unnecessary Add-ons: While add-ons are a significant part of the Kodi experience, having too many active can impact performance. Regularly review and turn off any add-ons you’re not actively using.
- Manage Media Library Size: Keep your Kodi media library organized and manageable. A large library can slow down the application’s responsiveness. Consider using external storage or cloud-based solutions to offload media files.
- Enable Hardware Acceleration: Kodi supports hardware acceleration, which can significantly improve video playback performance. Enable this feature in Kodi’s settings to take advantage of your Chromebook’s hardware capabilities.
- Optimize Video Codecs: Ensure that your Chromebook supports the video codecs used by your media files. Consider converting your media to a more compatible format to improve playback quality and performance if necessary.
- Disable Unnecessary Visualizations: Kodi’s visualizations can be resource-intensive, especially on lower-powered Chromebooks. To free up system resources, disable any unnecessary visualizations in the settings.
- Clear Cache and Data Regularly: Over time, Kodi’s cache and data can accumulate, leading to performance issues. Periodically clear the cache and data to maintain optimal performance.
By implementing these tips and tricks, you can ensure that Kodi runs smoothly and efficiently on your Chromebook, providing an exceptional media experience.
Also Read: How to Reset Display Settings on Windows 10
Frequently Asked Questions
Q: Can Kodi be installed on any Chromebook?
A: Kodi can be installed on most Chromebook models, but performance may vary depending on the device’s hardware specifications. For the best experience, it’s recommended to use a Chromebook with at least 4GB of RAM and a relatively recent processor.
Q: Do I need to root or unlock the bootloader on my Chromebook to install Kodi?
A: No, you don’t need to root or unlock the bootloader on your Chromebook to install Kodi. The installation involves enabling Developer Mode, a built-in feature in Chrome OS.
Q: Will installing Kodi void my Chromebook’s warranty?
A: Enabling Developer Mode and installing Kodi may not necessarily void your Chromebook’s warranty. Still, checking with the manufacturer or retailer for their specific policies is always a good idea.
Q: Can I use Kodi’s remote control feature on my Chromebook?
A: Kodi supports various remote control options, including mobile apps and dedicated remote control devices. You can set up a remote control to enhance your Kodi experience on your Chromebook.
Q: Will Kodi drain my Chromebook’s battery faster?
A: Kodi’s impact on battery life can vary depending on factors like the media you’re playing, the add-ons you have installed, and the overall hardware capabilities of your Chromebook. Optimizing Kodi’s settings and managing background processes can help mitigate battery drainage.
Conclusion
In this comprehensive guide, we’ve explored the process of installing Kodi on your Chromebook, unlocking a world of media entertainment and customization possibilities. Following the step-by-step instructions, you can enjoy Kodi’s rich features and extensive add-on ecosystem on your Chromebook, creating a tailored media experience that caters to your unique preferences.
Remember, the journey doesn’t end here. Continually explore Kodi’s capabilities, experiment with new add-ons, and optimize the performance to ensure you get the most out of your Chromebook-Kodi integration. With the right approach and some tinkering, you can transform your Chromebook into a powerful media hub that will elevate your entertainment experience.
If you found this guide helpful, subscribe to our newsletter for more informative articles and updates on the latest Kodi developments. Happy streaming!

