How to Taking Screenshots on Chrome Browser: Step-by-Step
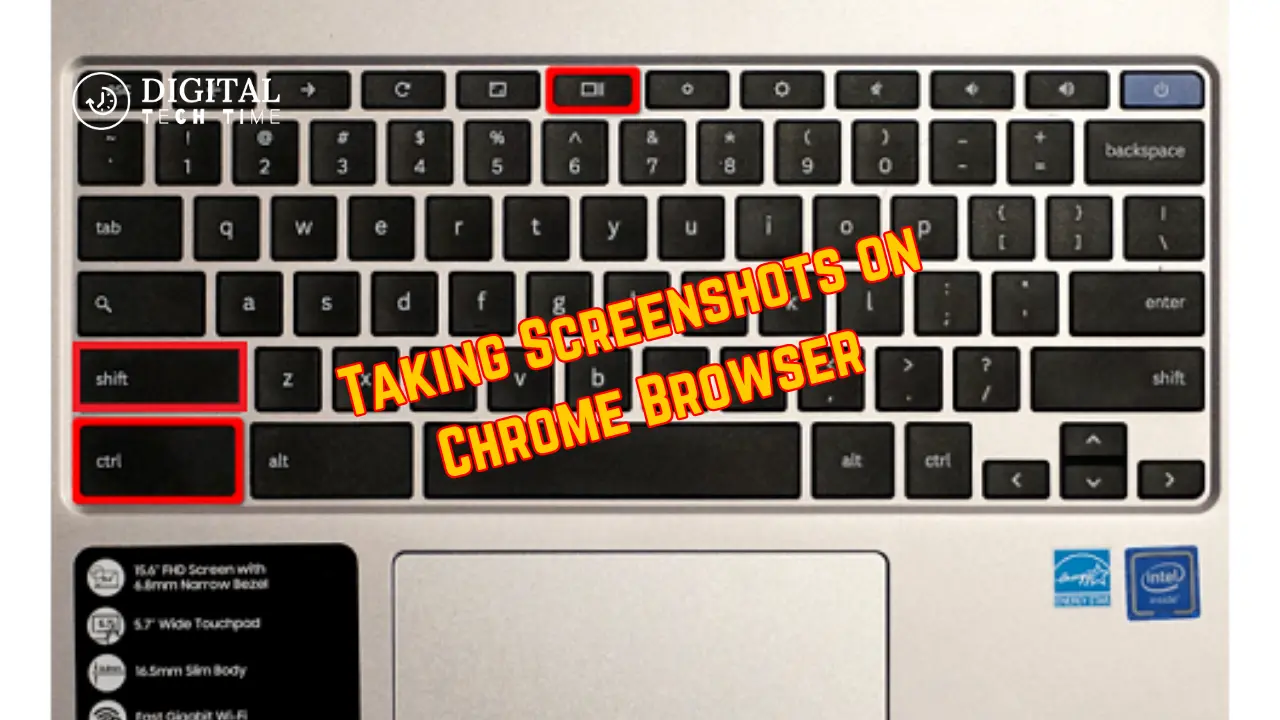
As a seasoned Chrome user, I understand the importance of capturing Screenshots on Chrome Browser to document, share, or save important information. Whether you’re troubleshooting a technical issue, sharing a funny moment with friends, or capturing a beautiful web page, the ability to take screenshots is a valuable skill. In this comprehensive guide, I’ll walk you through the various methods of taking screenshots on the Chrome browser, providing you with the knowledge and tools to master this essential task.
Table of Contents
Why taking screenshots is useful
Screenshots are a versatile tool that can be used in various scenarios. They can be used to:
- Document technical issues or errors for troubleshooting
- Capture and share interesting or funny moments online
- Save important information or web pages for future reference
- Collaborate with colleagues or team members by sharing visual information
- Create visual aids for presentations, tutorials, or documentation
By learning how to take high-quality screenshots on your Chrome browser, you’ll be able to streamline your workflow, improve communication, and enhance your overall productivity.
Different methods of taking screenshots on the Chrome browser
You can use several methods to take Screenshots on Chrome Browser. Let’s explore each one in detail:
Method 1: Using the built-in screenshot tool
Chrome’s built-in screenshot tool is a simple and convenient way to capture screenshots. To use it:
- Open the web page or content you want to capture.
- Press the “Ctrl + Shift + I” (Windows/Linux) or “Cmd + Option + I” (Mac) keyboard shortcut to open the Chrome DevTools.
- Click on the “Capture screenshot” icon (it looks like a camera) in the DevTools panel.
- Choose the desired capture area (full page, visible, or custom) and click “Capture.”
- The screenshot will be saved to your default download location.
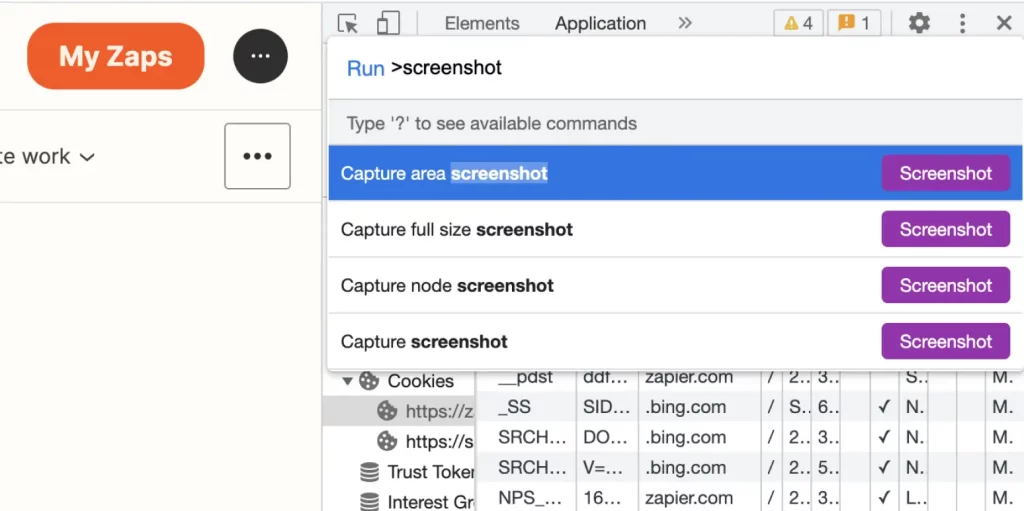
This method is excellent for quickly capturing web pages or specific elements on the page.
Method 2: Using keyboard shortcuts
Chrome also offers keyboard shortcuts for taking Screenshots on Chrome Browser. Here’s how to use them:
- Open the web page or content you want to capture.
- Press the “Ctrl + Shift + S” (Windows/Linux) or “Cmd + Shift + S” (Mac) keyboard shortcut.
- The screenshot will be captured and saved to your default download location.
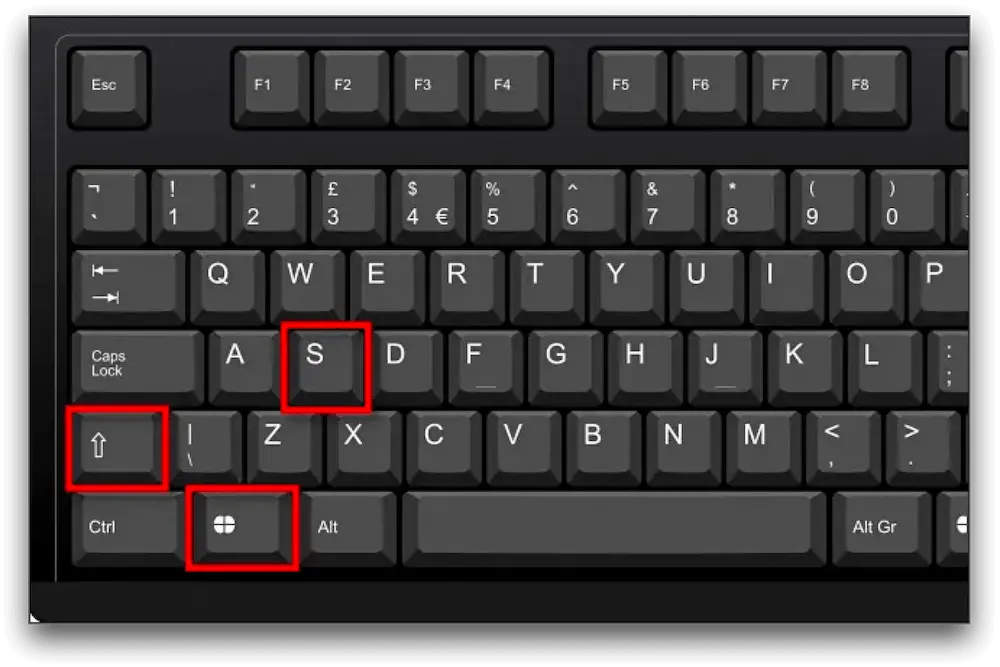
This simple and efficient method makes it an excellent option for frequent screenshot-takers.
Method 3: Using browser extensions
You can use a Chrome browser extension if you need more advanced screenshot capabilities. Some popular options include:
- FireShot: Allows you to capture full-page screenshots, annotate them, and save them in various formats.
- Nimbus Screenshot & Screen Video Recorder: Offers a wide range of screenshot and screen recording features, including the ability to capture scrolling screenshots.
- PicPick: Provides comprehensive image editing tools, including a screenshot capture feature.
To use these extensions, install them from the Chrome Web Store and follow the instructions provided by the extension.
Method 4: Using online screenshot tools
You can utilize online screenshot tools if you want to avoid installing extensions or using keyboard shortcuts. These tools allow you to capture screenshots directly from your browser without additional software. Some popular options include:
- Lightshot: A simple and user-friendly online screenshot tool that captures, annotates, and shares screenshots.
- Snapseed: An online image editing tool offering a screenshot capture feature.
- Dropbox Screenshot: If you have a Dropbox account, you can use their built-in screenshot tool to capture and save screenshots directly to your Dropbox.
To use these online tools, navigate to the website, follow the instructions, and your screenshot will be saved or shared as desired.
Tips for capturing high-quality screenshots
To ensure that your screenshots are clear, visually appealing, and serve their intended purpose, here are some tips:
- Adjust the resolution: Make sure your browser’s resolution is high enough to capture crisp and detailed screenshots.
- Avoid glare or reflections: Position your screen to minimize glare or reflections that could reduce the quality of your screenshots.
- Crop and edit as needed: Use image editing tools to crop, annotate, or enhance screenshots before sharing them.
- Use consistent file naming: Develop a consistent naming convention for your screenshots to make them easy to organize and locate.
- Save in the appropriate format: Choose the correct file format (e.g., PNG, JPEG) based on your needs, such as image quality, file size, and compatibility.
By following these tips, you can capture high-quality screenshots that effectively communicate your message or documentation.
Troubleshooting common screenshot issues
While taking Screenshots on Chrome Browser is generally straightforward, you may encounter some common issues. Here are a few troubleshooting tips:
- Screenshots not saving: Check your default download location or file permissions to ensure the screenshots are saved correctly.
- Blurry or low-quality screenshots: Ensure that your browser’s resolution is high enough and that you’re not experiencing any display scaling issues.
- Inability to capture full-page screenshots: If you’re using the built-in screenshot tool, try using a browser extension or an online tool that offers full-page capture capabilities.
- Capturing specific elements on the page: Use the “Capture screenshot” feature in Chrome DevTools to select and capture particular elements.
- Compatibility issues with screenshot tools: If you’re using a browser extension or an online tool, ensure it’s compatible with your Chrome version and operating system.
If you encounter any other issues, consult the tool’s documentation or the developer for support.
Also Read: How to Mastering Article Writing with AI Prompts
Frequently Asked Questions
Q: Can I take screenshots on Chrome on my mobile device?
A: Yes, you can take screenshots on Chrome for Android and iOS devices. The process may vary slightly depending on your device and operating system. Still, you can generally use your mobile device’s built-in screenshot functionality.
Q: Do I need to install any software or extensions to take screenshots on Chrome?
A: No, you don’t necessarily need to install any additional software or extensions to take basic screenshots on Chrome. The browser comes with built-in screenshot tools and keyboard shortcuts that you can use. However, you may need more advanced screenshot capabilities. In that case, you may consider using a browser extension or an online screenshot tool.
Q: How can I annotate or edit my screenshots after capturing them?
A: There are several ways to annotate or edit your screenshots after capturing them. You can use image editing software like Paint, GIMP, or Photoshop. Alternatively, you can use browser extensions or online tools with annotation and editing features, such as Nimbus Screenshot or Lightshot.
Q: Can I take screenshots of content that is behind a login or paywall?
A: You can take screenshots of content behind a login or paywall if you can access that content. However, be mindful of any terms of service or copyright restrictions that may apply to the content you’re capturing.
Q: How do I share my screenshots with others?
A: There are several ways to share your screenshots with others. You can save the screenshots to your local device and attach them to emails and messages or upload them to cloud storage services like Google Drive or Dropbox. Alternatively, you can use screenshot tools that offer built-in sharing features, such as Lightshot or Nimbus Screenshot, which allow you to share your screenshots via social media, messaging apps, or by generating a shareable link.
Conclusion: Mastering the art of taking screenshots on Chrome browser
In this comprehensive guide, we’ve explored the various methods of taking screenshots on the Chrome browser. From using the built-in tools to leveraging browser extensions and online screenshot services, you now have a solid understanding of your options.
Remember, capturing high-quality screenshots can be a valuable asset in your daily workflow, whether you’re troubleshooting technical issues, collaborating with colleagues, or simply sharing moments with friends and family.
If you found this guide helpful, be sure to check out our [Chrome browser extension] for even more powerful screenshot and screen recording capabilities. With advanced features like full-page capture, annotation tools, and cloud integration, you can take your screenshot game to the next level.
By mastering the art of taking screenshots on Chrome, you’ll be able to streamline your workflow, improve communication, and enhance your overall productivity. So, start capturing those moments, documenting those issues, and sharing your digital adventures with the world!
