How to Remove Bing Search in Windows 11 Step-by-Step Guide
Today, I’ll show you How to Remove Bing Search in Windows, Despite its integration with advanced AI features, Microsoft’s Bing search engine often needs to catch up with many Windows users who prefer alternative search engines like Google. The constant presence of Bing in Windows 10 and 11 can slow down the search experience, consume valuable system resources, and hinder productivity. If you want to regain control over your search experience, this guide will walk you through the steps to remove Bing search from Windows entirely. Whether you’re using Microsoft Edge or Firefox or simply want Bing gone from your Windows system, we’ve got you covered.
Table of Contents
Why Remove Bing Search from Windows?
Bing search may offer some unique features, but there are several reasons why you might prefer to remove it:
- Performance Issues: Bing’s integration can slow local searches and consume significant RAM and CPU resources.
- Preference for Other Search Engines: Many users are accustomed to Google or other search engines that provide more relevant results.
- Privacy Concerns: Some users are uncomfortable with Bing’s data collection practices.
Methods to Remove Bing Search from Windows
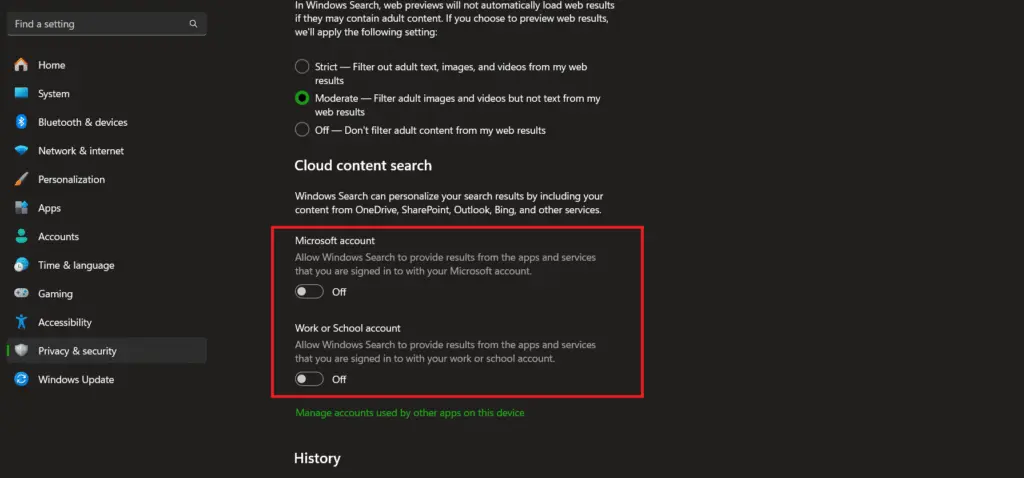
Method 1: Disable Bing Cloud Search in Windows 11/10
- Open Windows Search and click the three-dot menu next to the Bing icon.
- Select “Search settings”.
- Under “Cloud content search,” turn off the toggles for both “Microsoft account” and “Work or School account.”
Also Read: Fixes for Non-Working Headphones on Windows 10
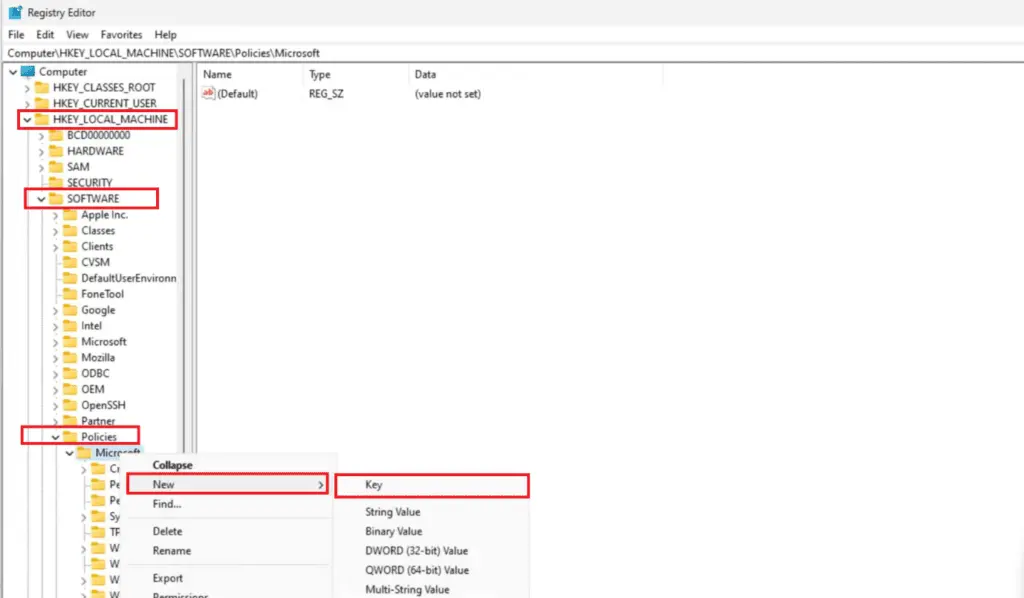
Method 2: Remove Bing Search Using Registry Editor
- Press the Windows key, type “registry,” and open the Registry Editor.
- Navigate to Computer\HKEY_CURRENT_USER\Software\Policies\Microsoft\Windows\Explorer.
- Right-click on “Explorer” and choose New -> DWORD (32-bit) value.
- Name the new value DisableSearchBoxSuggestions.
- Double-click on it, set the value data to 1, and click “OK.”
- Restart your PC.
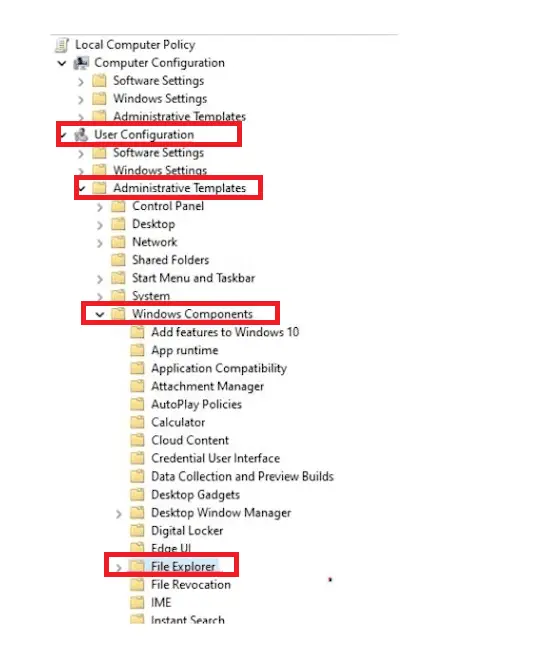
Method 3: Remove Bing Search Using Group Policy Editor
- Press the Windows key, type “group policy,” and open “Edit group policy.”
- Navigate to User Configuration > Administrative Templates > Windows Components > Search.
- Double-click on “Do not allow web search” and “Don’t search the web or display web results in Search.”
- Enable both settings.
- Restart your PC.
How to Remove Bing from Microsoft Edge

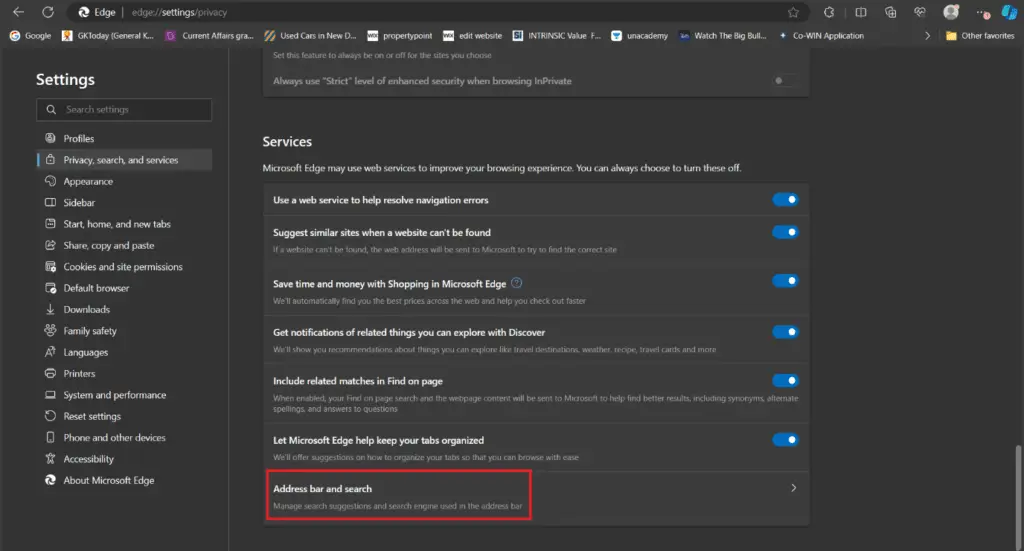
- Open Microsoft Edge.
- Click the three dots in the top right corner and select “Settings.”
- Navigate to “Privacy, search, and services.”
- Scroll down to “Address bar and search”.
- Under “Search engine used in the address bar,” select your preferred search engine (e.g., Google).
Also Read: Master the Art of Using Google’s Cursive App on Any Laptop
How to Remove Bing from Firefox
Change Default Search Preference
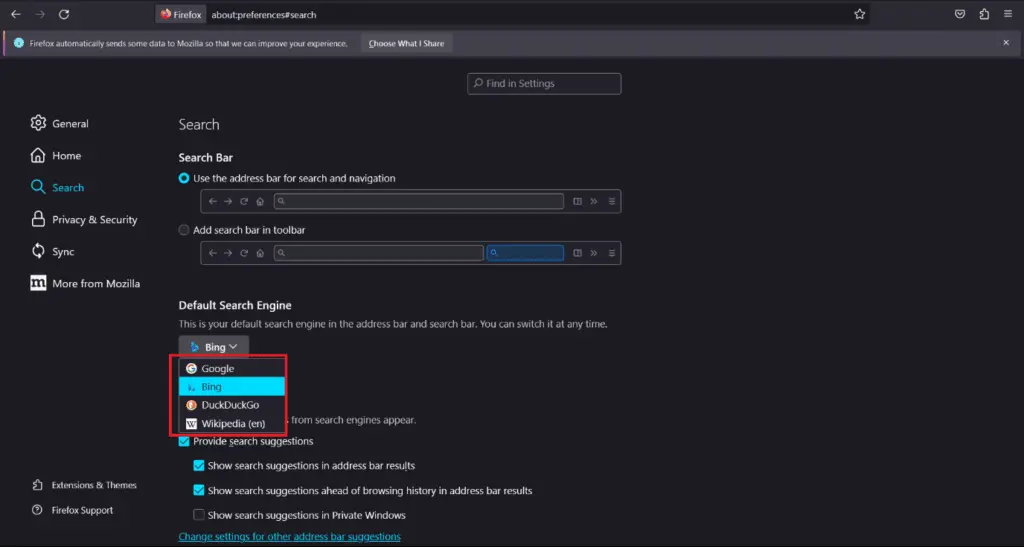
- Open Firefox.
- Click the three lines in the top right corner and select “Settings.”
- Click on “Search” from the left panel.
- Under the search bar, select a different search engine from the dropdown menu.
Remove Bing Extension
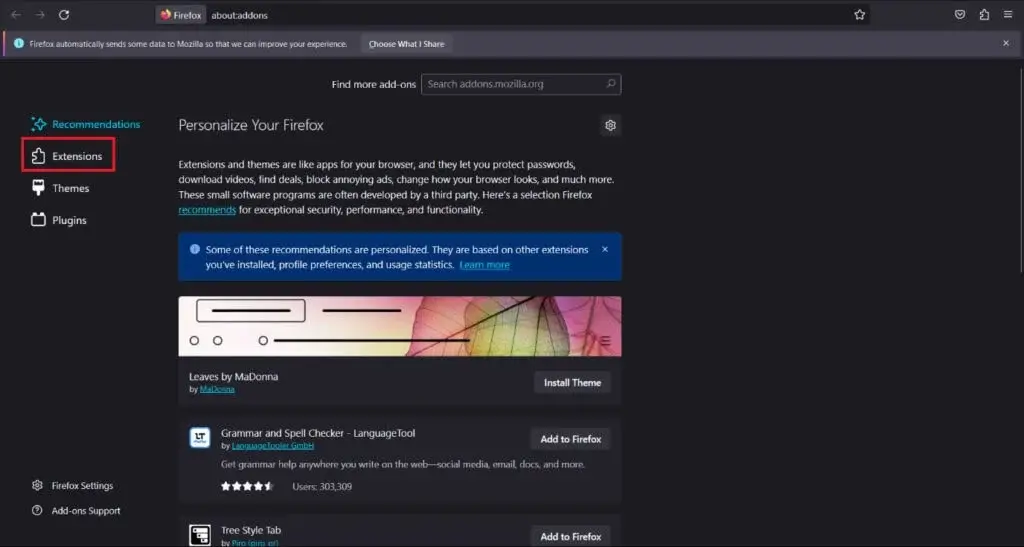
- Open Firefox and click the three lines in the top right corner.
- Select “Add-ons and themes.”
- Click on “Extensions” from the left panel.
- Find the Bing extension, click the three dots, and select “Remove.”
Additional Tips for Customizing Your Search Experience
- Disable the Bing Icon from the Taskbar: Open Settings, navigate to Privacy & security > Search permissions, and turn off “Show search highlights.”
- Turn Off Bing Cloud Search: Like disabling Bing from Search settings, follow the same steps and disable Bing from the cloud content search menu.
Frequently Asked Questions
Q: Why is Bing still appearing in my search results after following these steps?
A: If Bing still appears in your search results, ensure you have followed each method correctly and restarted your computer. You may need to double-check the Registry Editor and Group Policy Editor settings.
Q: Can I reinstall Bing if I change my mind?
A: You can easily reinstall or re-enable Bing search by reversing the steps mentioned in the respective methods.
Q: Will removing Bing affect my Windows updates or system performance?
A: Removing Bing will not affect Windows updates or system performance. It may improve performance by reducing resource consumption.
Conclusion
Removing Bing search from Windows can significantly enhance your browsing and search experience by improving speed and reducing unnecessary CPU and RAM usage. Whether you prefer using the Registry Editor, Group Policy Editor, or simply changing settings in your browser, this guide provides a comprehensive approach to eliminate Bing from your system. Customize your Windows environment to suit your preferences and enjoy a streamlined search experience with your preferred search engine. Keep exploring our blog for more tips and tricks on optimizing your Windows system.
Following the steps outlined above, you can ensure a more efficient and personalized search experience on your Windows 10 or 11 PC. Say goodbye to Bing and hello to a search engine that genuinely meets your needs. Please leave comments and queries below for further assistance or more detailed guides.

