How to Remove Facebook Birthdays from Android Calendar
As a busy Android user, I understand the importance of keeping your calendar organized and clutter-free. However, one common issue many of us face is the unwanted presence of Facebook birthdays in our Android calendars. This can quickly lead to a cluttered and overwhelming calendar, making staying on top of your schedule challenging. In this comprehensive guide, I’ll walk you through a step-by-step process to remove Facebook birthdays from your Android calendar, helping you regain control and maintain a clean, efficient calendar experience.
Table of Contents
Why are Facebook birthdays showing up on your Android calendar?
When you connect your Facebook account to your Android device, the platform automatically syncs your Facebook friends’ birthdays to your Android calendar. This feature will help you remember and celebrate your loved ones’ special days. However, as your Facebook friend list grows, the number of birthdays in your calendar can quickly become unmanageable, leading to a cluttered and confusing calendar view.
The impact of Facebook birthdays on your Android calendar
The presence of Facebook birthdays in your Android calendar can have several negative impacts on your overall productivity and organization:
- Cluttered calendar: With numerous Facebook birthdays added to your calendar, it can become increasingly difficult to find and focus on your important events and appointments.
- Decreased productivity: The constant reminders and notifications for Facebook birthdays can be distracting, reducing productivity and focus on daily tasks.
- Difficulty managing your schedule: The sheer number of Facebook birthdays can make it challenging to manage your calendar effectively and keep track of your important events.
Step 1: Accessing your Android calendar settings
To remove Facebook birthdays from your Android calendar, you’ll need to access your device’s calendar settings. The exact steps may vary slightly depending on your Android device’s manufacturer and version, but the general process is as follows:
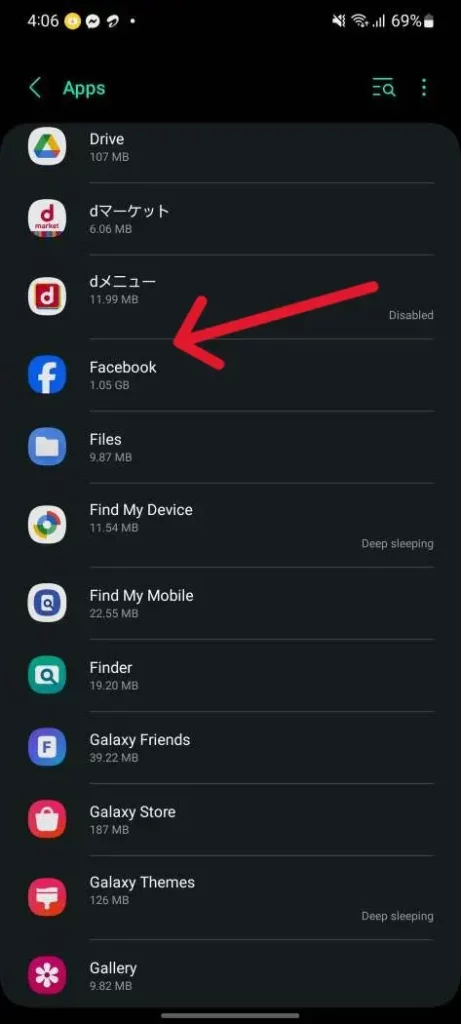
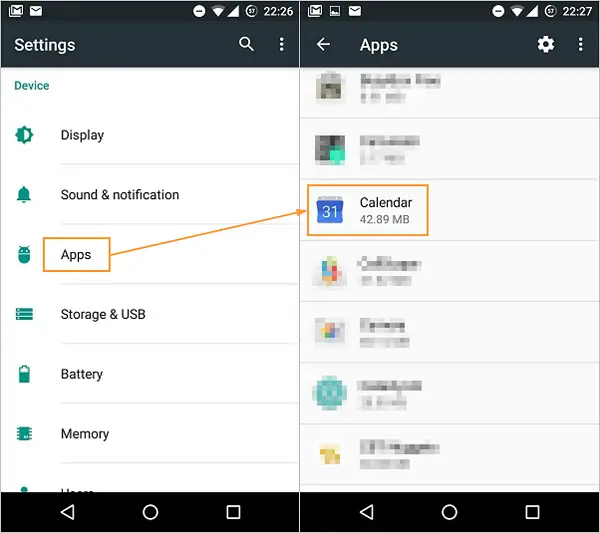
- Unlock your Android device and locate the “Settings” app.
- Tap on the “Settings” app to open it.
- Scroll down and find the “Apps” or “Applications” section, then tap on it.
- Locate the “Calendar” app and tap on it to access the app-specific settings.
Step 2: Finding the calendar sync settings
You’ll need to find the sync settings within the calendar app. This is where you can manage the various calendars and accounts connected to your Android device.
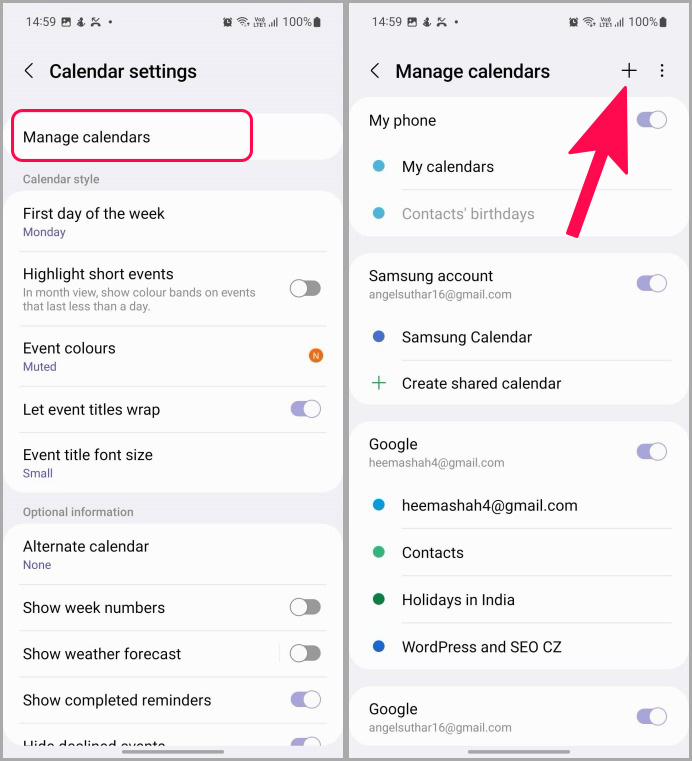
- Tap the “Sync” or “Accounts” option within the calendar app settings.
- You should see a list of all the calendars and accounts currently synced with your Android calendar.
- Locate the “Facebook” calendar or account and make a note of it, as you’ll need this information in the next step.
Step 3: Removing the Facebook birthdays calendar
Now that you’ve identified the Facebook calendar or account, it’s time to remove it from your Android calendar.
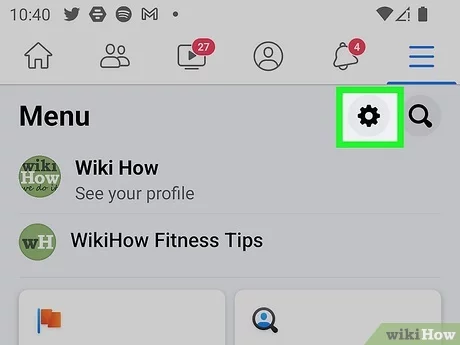
- Tap on the “Facebook” calendar or account in the sync settings.
- Look for an option to “Disable” or “Remove” the calendar or account, and select it.
- Confirm the action and the Facebook birthdays should be removed from your Android calendar.
Step 4: Adjusting the sync settings for other calendars
After removing the Facebook birthday calendar, review the sync settings for your other connected calendars to ensure your Android calendar remains organized and clutter-free.
- Revisit the “Sync” or “Accounts” section of your calendar app settings.
- Examine the list of connected calendars and accounts, and consider disabling or removing any that you no longer need or use.
- Ensure that the remaining calendars are syncing only the necessary events and information, helping to maintain a clean and efficient calendar view.
Alternative methods to remove Facebook birthdays from your Android calendar
While the steps outlined above are the primary method for removing Facebook birthdays from your Android calendar, there are a few alternative approaches you can consider:
- Disable Facebook calendar sync: Instead of removing the calendar, you can turn off or disable the calendar sync feature in your Facebook app settings. This will prevent new Facebook birthdays from being added to your Android calendar but won’t remove the existing ones.
- Use a third-party calendar app: Consider using a third-party calendar app, such as Google Calendar or Microsoft Outlook, which may offer more advanced options for managing and customizing your calendar view, including the ability to hide or remove Facebook birthdays selectively.
- Unlink your Facebook account: As a last resort, consider entirely unlinking your Facebook account from your Android device. This will remove all Facebook-related data, including birthdays, from your Android calendar but may also disconnect other useful Facebook integrations.
Troubleshooting common issues
While removing Facebook birthdays from your Android calendar is straightforward, you may encounter some common issues. Here are a few troubleshooting tips:
- Facebook calendar still visible: If you’ve followed the steps but the Facebook calendar is still visible in your Android calendar, try force-stopping the Calendar app, clearing its cache, or restarting your device.
- Facebook birthdays reappearing: If the Facebook birthdays keep reappearing in your Android calendar, check your Facebook app settings to ensure that the calendar sync feature is disabled, and review the sync settings for your other connected calendars.
- Unable to find the Facebook calendar: If you’re unable to locate the Facebook calendar in your Android calendar settings, try searching for it using the calendar app’s search function or contacting your device manufacturer’s support team for further assistance.
Frequently Asked Question
Q: Why are Facebook birthdays showing up on my Android calendar in the first place?
A: When you connect your Facebook account to your Android device, the platform automatically syncs your Facebook friends’ birthdays to your Android calendar. This feature will help you remember and celebrate your loved ones’ special days.
Q: Can I selectively remove only the Facebook birthdays from my Android calendar?
A: Yes, the steps outlined in this guide will allow you to remove the Facebook birthday calendar from your Android calendar without affecting other calendar events or accounts.
Q: Will removing the Facebook calendar also remove other Facebook-related information from my Android device?
A: Removing the Facebook calendar will only affect the birthdays and events synced from Facebook. It will not remove any other Facebook-related data or integration from your Android device.
Q: What if I still want to see my Facebook friends’ birthdays, but in a more organized way?
A: Consider using a third-party calendar app, such as Google Calendar or Microsoft Outlook, which may offer more advanced options for managing and customizing your calendar view, including the ability to hide or remove Facebook birthdays selectively.
Conclusion
Maintaining a clean and organized Android calendar is essential for managing your daily schedule and improving your overall productivity. By following the step-by-step guide outlined in this article, you can easily remove the clutter of Facebook birthdays from your Android calendar, reclaiming control over your calendar, and ensuring that your important events and appointments are always at the forefront.
If you found this guide helpful, check out our other Android productivity and organization articles. Don’t forget to subscribe to our newsletter for the latest tips and tricks to optimize your Android experience.
Related Article: Switching Wi-Fi Bands on Android: From 2.4 GHz to 5 GHz


