Fix Restore Point Not Working in Windows 10
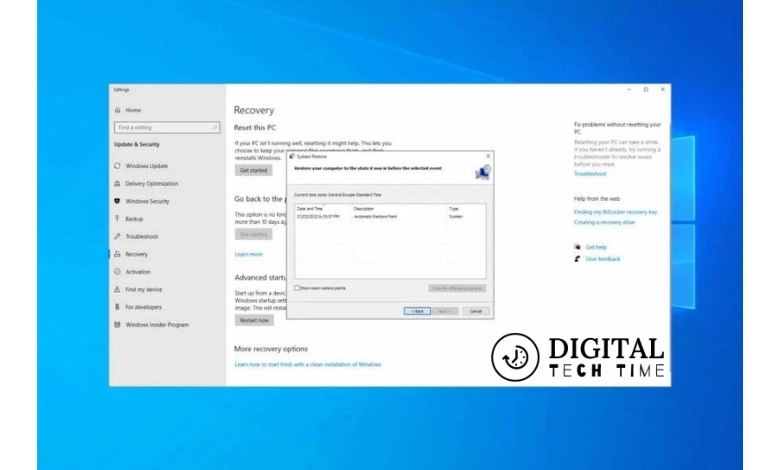
System Restore is a valuable feature in Windows 10 that allows users to revert their system to a previous state in case of issues. However, users may sometimes find that their restore points must be fixed. This can be frustrating, but several methods can help resolve this issue. This blog post will guide you through the steps to fix restore points that are not working in Windows 10.
Table of Contents
Step-by-Step Guide
Method 1: Run CHKDSK and System File Checker
Corrupted system files or disk errors can cause restore points to fail. Running CHKDSK (Check Disk) and the System File Checker (SFC) can help identify and fix these issues.
- Run CHKDSK:
- Press Windows Key + X and select Command Prompt (Admin).
- Type chkdsk /f /r and press Enter.
- You may need to restart your PC to allow CHKDSK to run and fix any detected errors.
- Run System File Checker:
- Open Command Prompt (Admin) again.
- Type sfc /scannow and press Enter.
- Wait for the scan to complete and fix any corrupted system files.
Method 2: Enable System Restore
Ensure that System Restore is enabled on your PC.
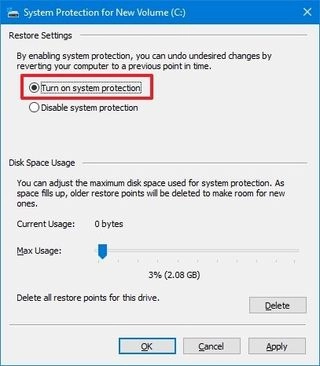
- Press Windows Key + R to open the Run dialogue box.
- Type system. Ctrl and press Enter.
- Go to the System Protection tab.
- Select your system drive (usually C:) and click Configure.
- Make sure Turn-on system protection is selected.
- Click Apply and then OK.
Method 3: Enable System Restore from Registry Editor
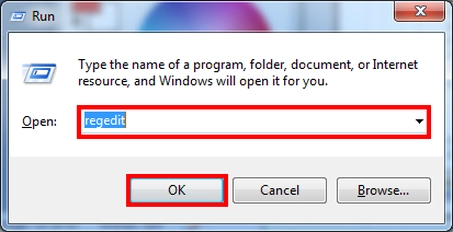
If System Restore is disabled in the registry, you must enable it.
- Press Windows Key + R, type “regedit“, and press Enter.
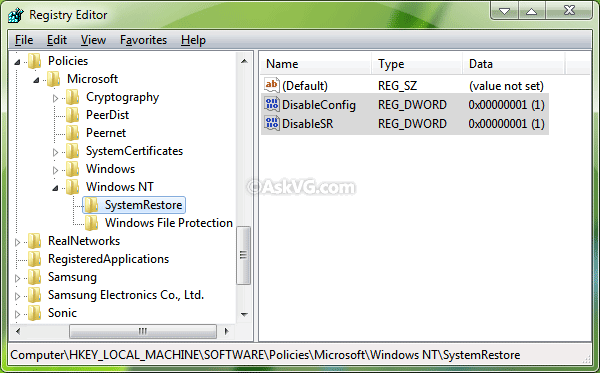
- Navigate to the following path:
- Copy code
- HKEY_LOCAL_MACHINE\SOFTWARE\Policies\Microsoft\Windows NT\SystemRestore
- If you find entries named “DisableSR” or “DisableConfig“, double-click on them and set their value to 0.
- Restart your computer.
Method 4: Temporarily Disable Antivirus
Sometimes, antivirus software can interfere with System Restore. Temporarily disabling your antivirus may resolve the issue.
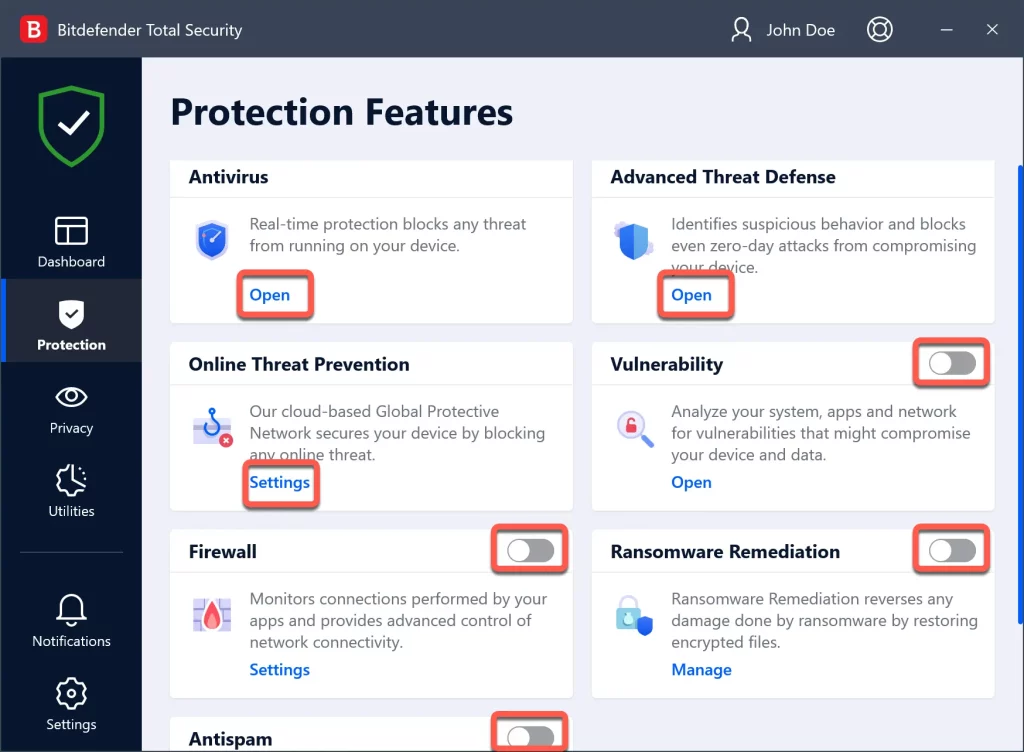
- Open your antivirus software.
- Find the option to disable it temporarily.
- Try rerunning System Restore.
- Remember to re-enable your antivirus after the restore process.
Method 5: Perform a Clean Boot
A clean boot can help identify if any third-party applications or services are causing the issue.
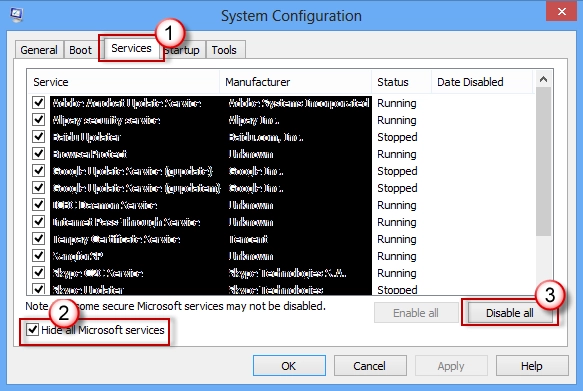
- Press Windows Key + R, type “msconfig“, and press Enter.
- Go to the Services tab and check Hide all Microsoft services.
- Click Disable All.
- Go to the Startup tab and click Open Task Manager.
- Disable all startup items.
- Restart your computer and try using System Restore again.
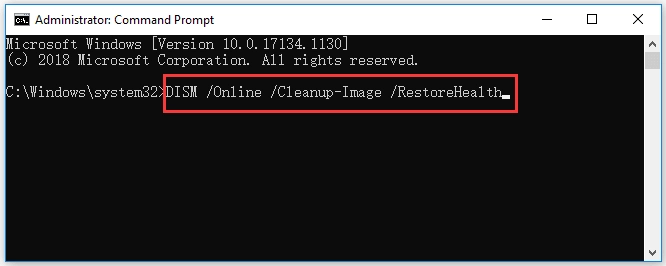
Method 6: Run DISM (Deployment Image Servicing and Management)
DISM can repair a corrupted Windows image, which might be causing the restore point issue.
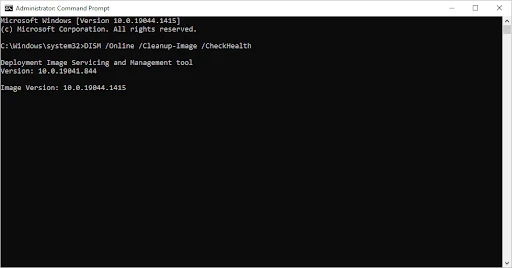
- Open Command Prompt (Admin).
- Type the following commands and press Enter after each:
- Mathematica
- Copy code
- DISM /Online /Cleanup-Image /CheckHealth
- DISM /Online /Cleanup-Image /ScanHealth
- DISM /Online /Cleanup-Image /restore health
- Wait for the process to complete, then restart your computer.
Method 7: Check if System Restore Services Are Running
Ensure that the necessary services for System Restore are running.
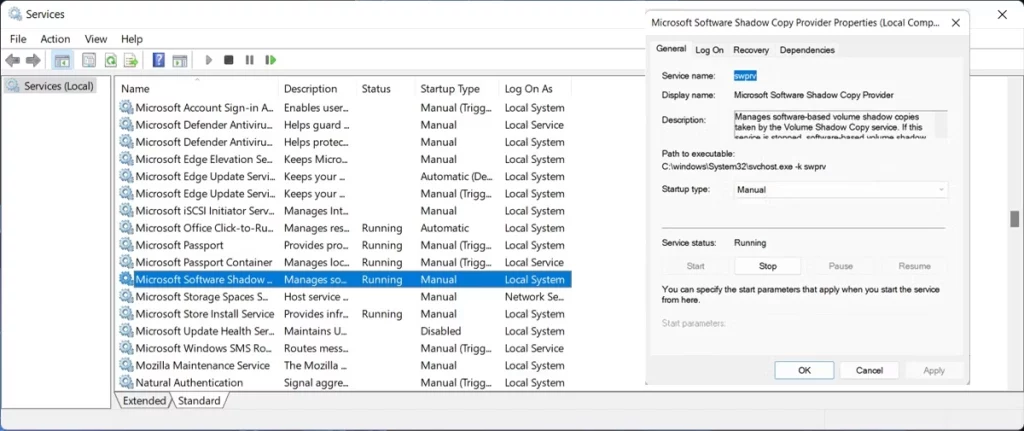
- Press Windows Key + R, and type “services.msc“, and press Enter.
- Find and double-click the following services:
- Volume Shadow Copy
- Microsoft Software Shadow Copy Provider
- Set their Startup type to Automatic.
- Click Start if the service is not already running.
- Click Apply and then OK.
Method 8: Repair Install Windows 10
If none of the above methods work, a repair install might be necessary.
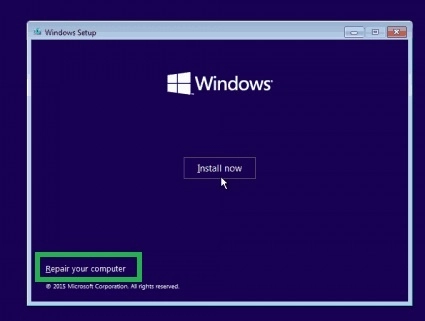
- Download the Windows 10 installation media from the official Microsoft website.
- Run the setup file and choose Upgrade this PC now.
- Follow the on-screen instructions to complete the repair install.
- This process will reinstall Windows without affecting your personal files.
Related Post : How to Fix the “Cannot Create Key” Error Writing to the Registry
Frequently Asked Questions (FAQs)
How to fix restore point not working?
Fix 1: Run System Restore in Safe Mode
Restart your computer, press “F8” during the boot process to open the Windows “Advanced Boot Options” menu and enter “Safe Mode”. Step 2. In the Safe Mode menu, type recovery into the Start Menu search bar and select “Recovery” from the list.
How do I force a restore point in Windows 10?
In the Control Panel search box, type recovery. Select Recovery > Open System Restore. In the Restore system files and setting box, select Next. Select the restore point that you want to use in the list of results, and then select Scan for affected programs.
Why does my System Restore keep failing?
In most cases, the System Restore failed and did not complete successfully error appears because your Antivirus software is interfering with System Restore. So, if you’re running antivirus software, disable it.
How do I restore Windows 10 in Safe Mode?
Restart the computer in Safe Mode. Click on the Windows icon in the lower left corner, type System Restore and click on Create a Restore Point. Click on the System Restore button.
How do I manually restore Windows 10?
This can solve recent software issues without affecting personal files. To access “System Restore,” use the “Cortana” search box on the “taskbar” and type “Recovery.” Then, select the “Open System Restore” link and choose a restore point from the list. Confirm the selection and restart the computer.
Conclusion
By following these methods, you can fix the issue of restoring points that are not working in Windows 10. Regularly creating restore points and updating your system can help prevent such problems. If you encounter any difficulties or have further questions, seek additional assistance in the comments section or contact a professional technician for more advanced support.


